

How To Use Windows 10 Photo App
On Windows x, Photos is an essential app designed to help you to organize your pictures and videos. Using the app, y'all tin view your media files. You tin edit them, and easily share those memories with family and friends.
Notwithstanding, the Photos app is more than but an experience to organize your digital memories, as information technology as well includes a powerful video editor similar to the legacy Windows Movie Maker, which you can use to create videos automatically, or from scratch with music, text, and motion, and modern features, such every bit 3D effects.
In this Windows 10 guide, we'll walk you through the steps to get started creating videos using the Photos app. This guide outlines all the steps you need to know, from creating a video automatically to creating and editing a projection from outset to end.
- How to create video automatically using Photos
- How to create video projection manually using Photos
- How to edit video project using Photos
- How to add 3D effects video projection using Photos
- How to fill-in video project using Photos
How to create video automatically using Photos
The Photos video editor allows you to create video projects from scratch, or you can select the media elements to let the editor create a video automatically.
To create a video automatically using the Photos app, apply these steps:
- Open up Photos.
- Click the Video Editor tab.
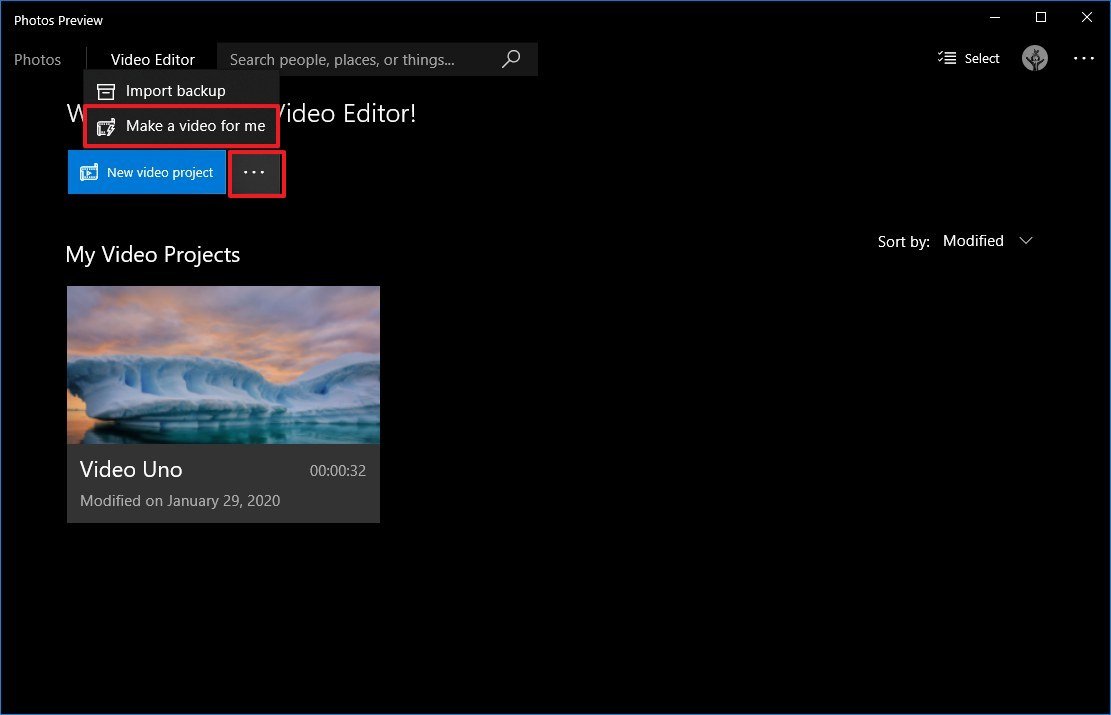
-
Click the menu (three-dotted) button next to the New video project button, and select the Brand a video for me option.
 Source: Windows Central
 Quick tip: Y'all tin can besides commencement a new automated video project from the Photos abode by clicking the New video selection from the top-right, and selecting the Automated video option.
-
Click the Make a video for me choice.
 Source: Windows Fundamental
 - Select the videos and images for the project.
-
Click the Create button.
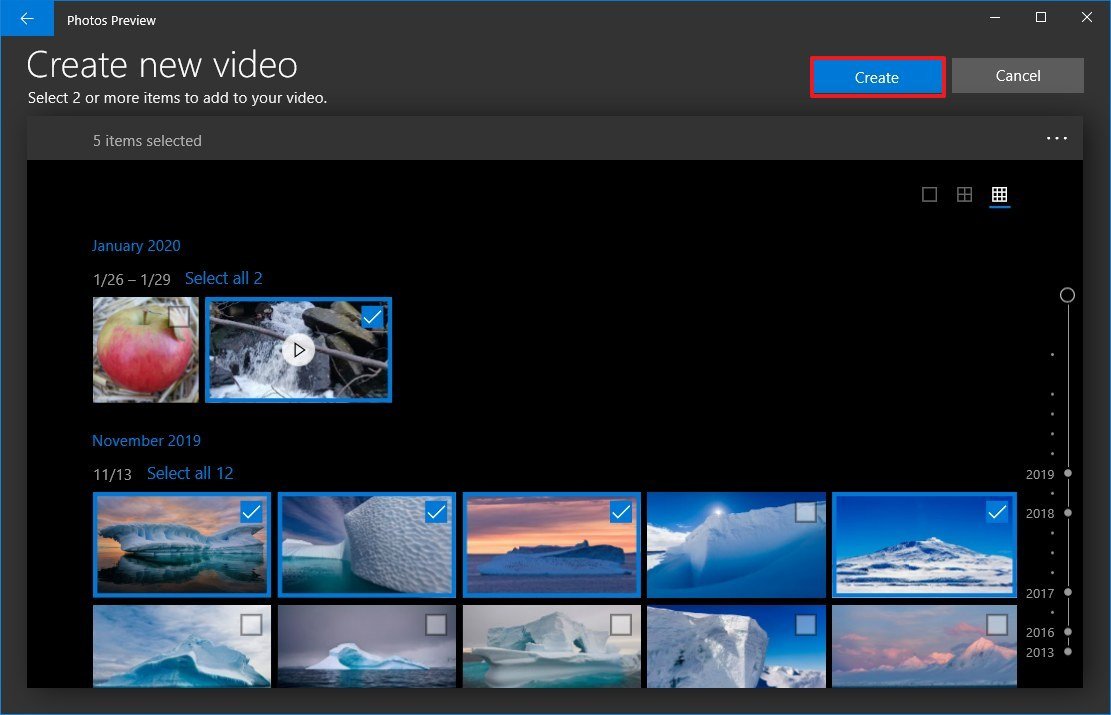 Source: Windows Cardinal
 - Specify a descriptive name for the project.
-
Click the OK button.
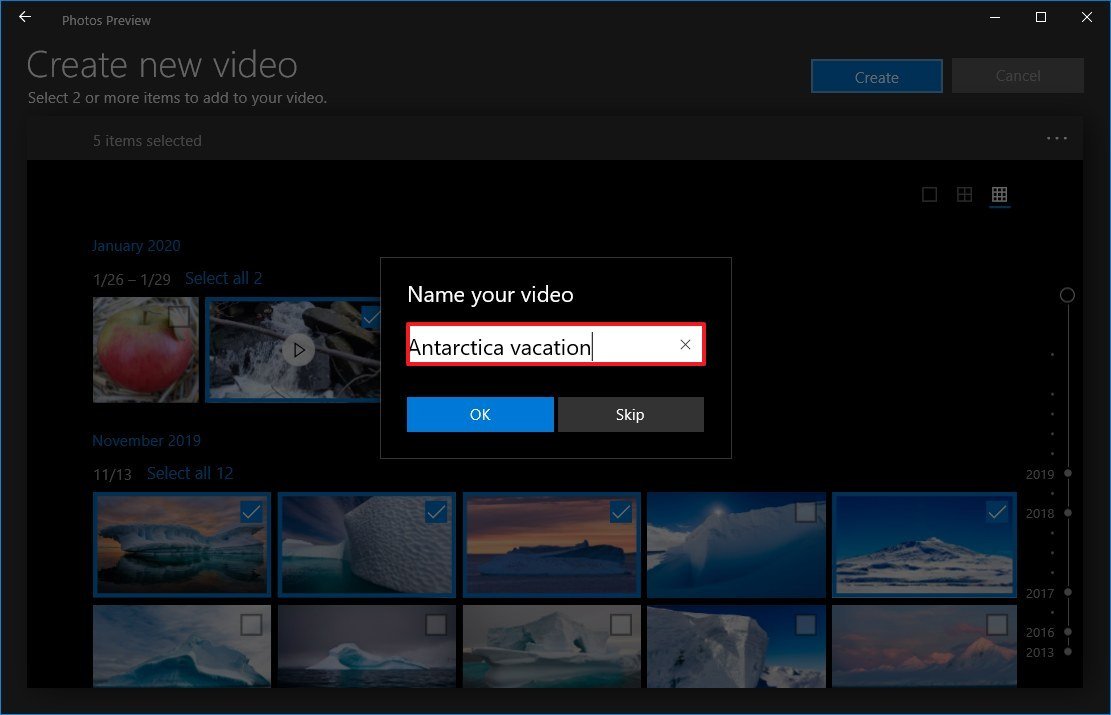 Source: Windows Central
 -
(Optional) Click the Remix it for me push to change the theme.
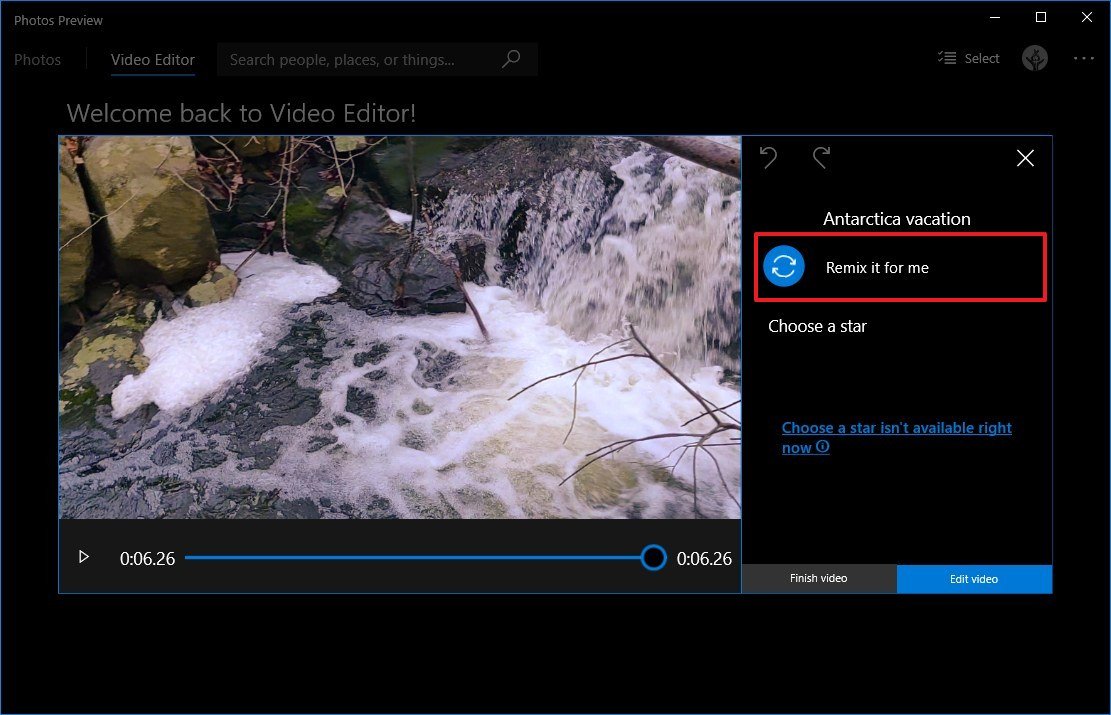 Source: Windows Primal
 - Click the Finish video button.
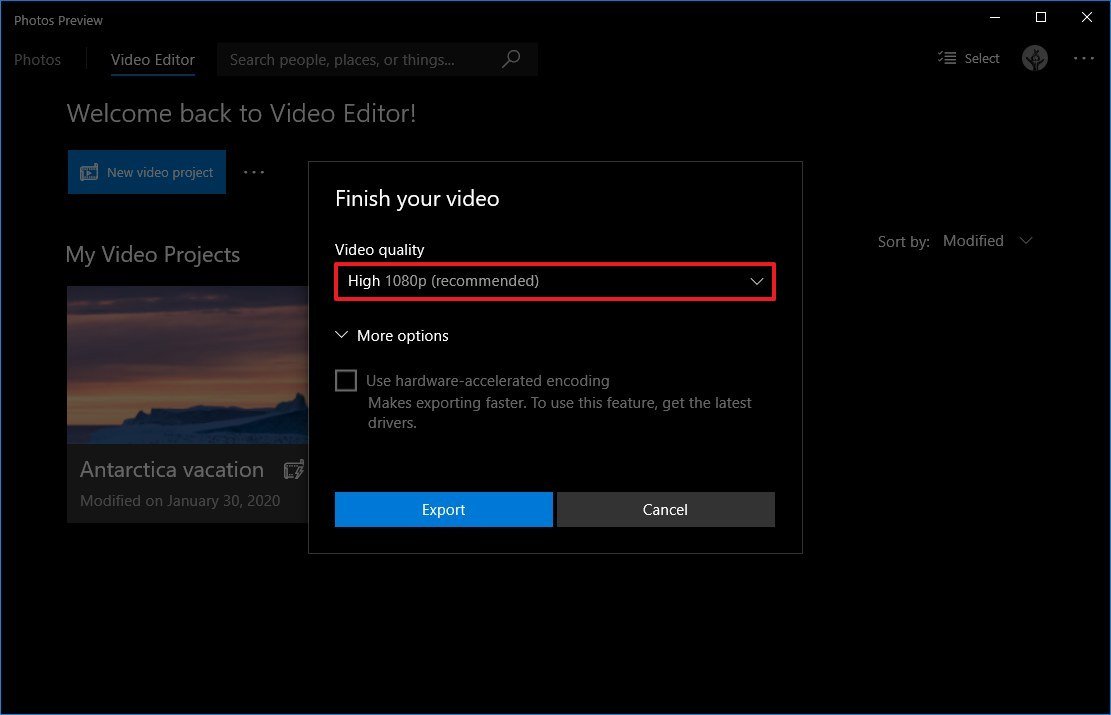
-
Utilise the "Video quality" driblet-downwardly bill of fare and select the quality of the video (High 1080p, Medium 720p, or Low 540p).
 Source: Windows Central
 Quick tip: The lower the quality, the lower the quality of the video will exist, only it'll crave less space, which tin can also brand it easier for sharing.
- Bank check the Use hardware-accelerated encoding option (if applicable).
- Click the Consign push button.
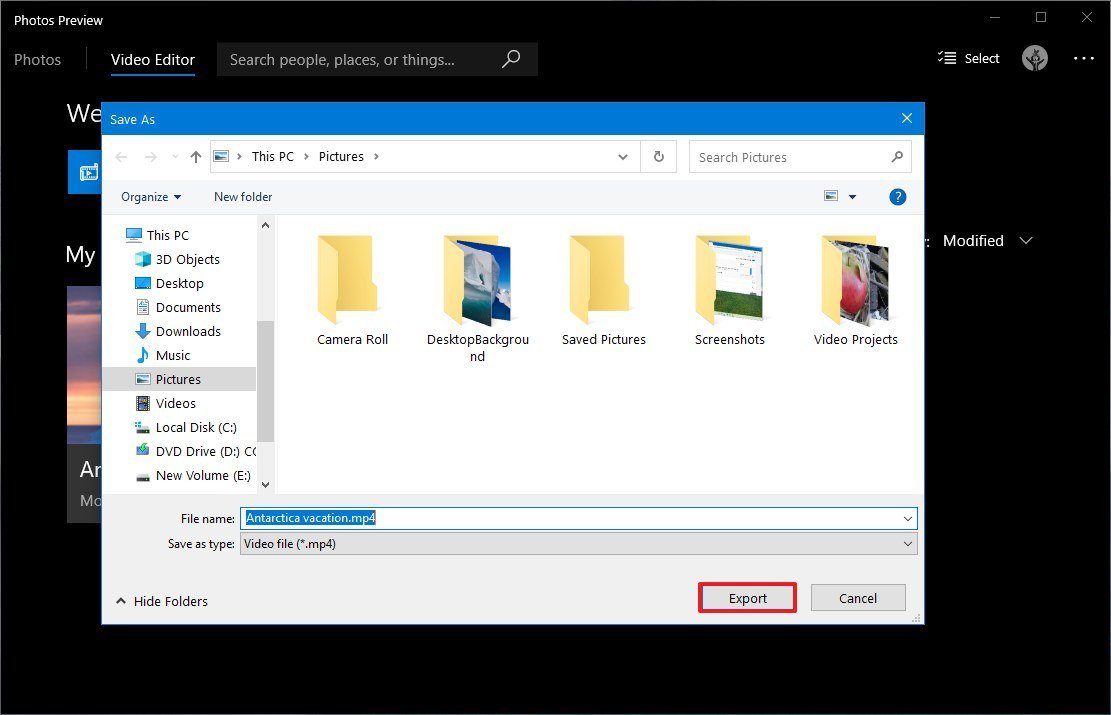
- Select a folder to save the video project as a .mp4 file.
-
Click the Export button.
 Source: Windows Fundamental


In one case you consummate the steps, the video will be created and exported, and you can at present play it with any device that supports MP4 playback. Or you tin can share it with anyone using e-mail, social media, or you tin even upload it to YouTube for the globe to see your creation.
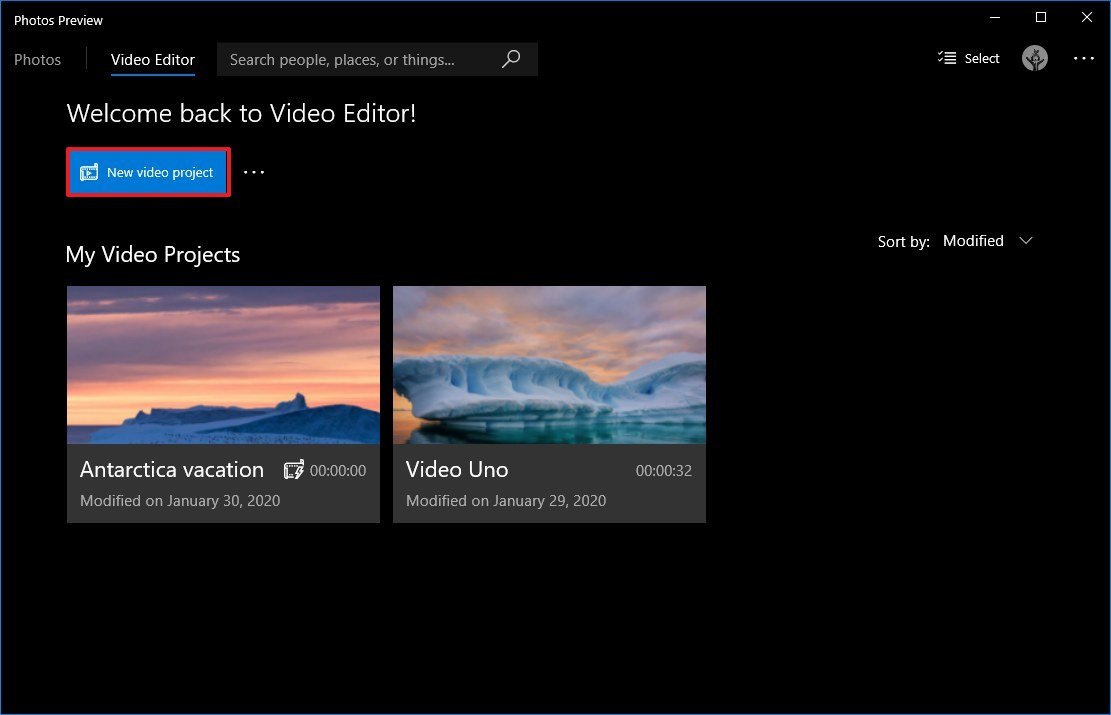
How to create video projection manually using Photos
To create a video project from scratch using the Photos app, utilise these steps:
- Open up Photos.
-
Click the Video Editor tab.
Source: Windows Primal -
Click the New video project push button.
 Source: Windows Central
 - Specify a descriptive proper name for the project.
- Click the OK button.

After you lot complete the steps, you tin start adding content to the storyboard to go on editing the project with various options, including text, duration, motion, 3D effects, and more than. The video editor also has a live preview that yous can apply to cheque the process before exporting the video.
How to edit video project using Photos
Once yous created a new project, yous'll be presented with the video editor experience, which is fabricated up of three master sections. Y'all have the "Projection library" at the summit-left side, which is the place where you'll add the images and videos that you'll be using in the project.
At the bottom, you'll notice the "Storyboard" section, which is where you can drag and drop the media elements to build your video. Also, depending on the content you're editing, you'll become a different set of features you can apply to edit.
On the top-right side, you can preview your projection with all the current changes, and as yous play the video, you'll see the timeline highlighting the card existence played.
Adding media elements
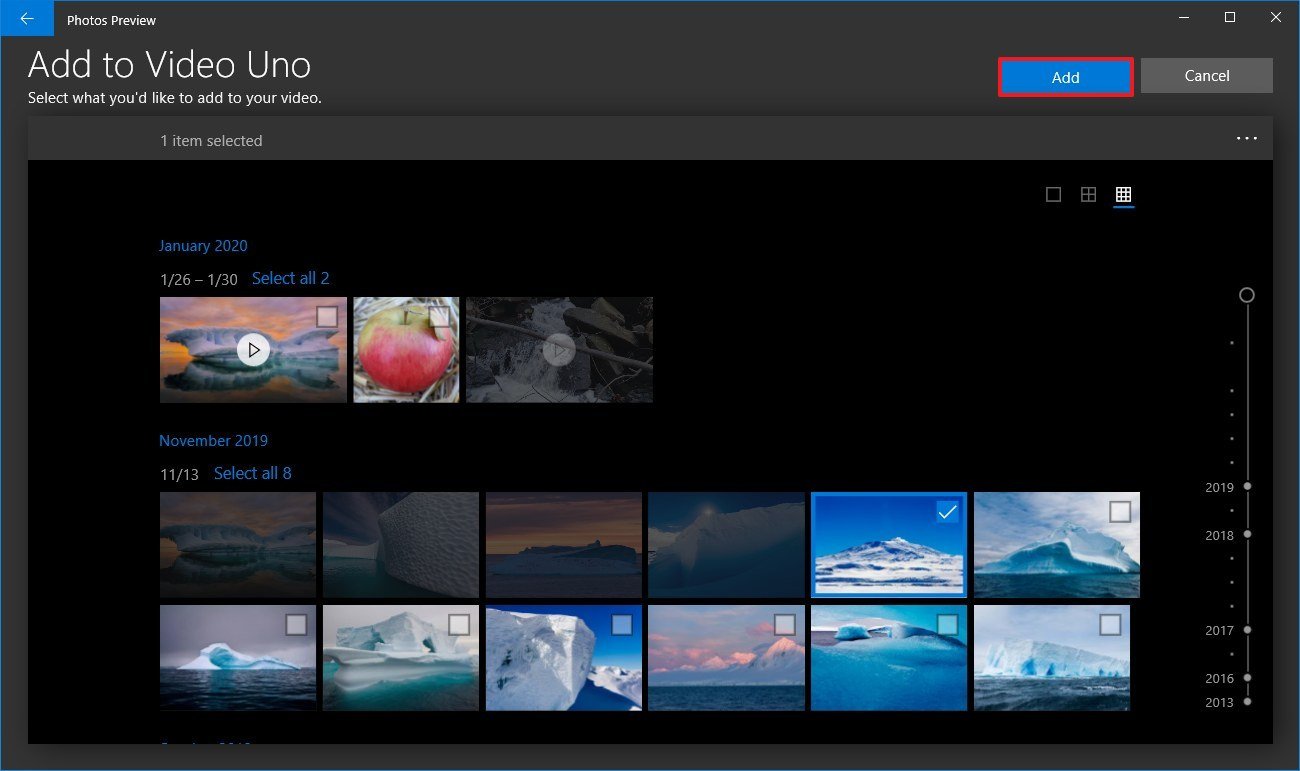
To add new media files to the video projection, apply these steps:
- Under the "Projection Library" section, click the Add button in the elevation-left corner.
-
Select the From my collection selection.
 Source: Windows Key
 Quick notation: The video editor also allows you to import files that are not function of the Photos app, such equally from an external drive, using the "From this PC" pick, and you can even apply the "From the web" option to download images from Bing.
- Select the pictures and videos yous want to be part of the project.
-
Click the Add together push from the tiptop-right corner.
 Source: Windows Central
 - Check the media elements to begin your video.
-
Click the Place in storyboard push button. (You can too drag-and-drib the files to the storyboard.)
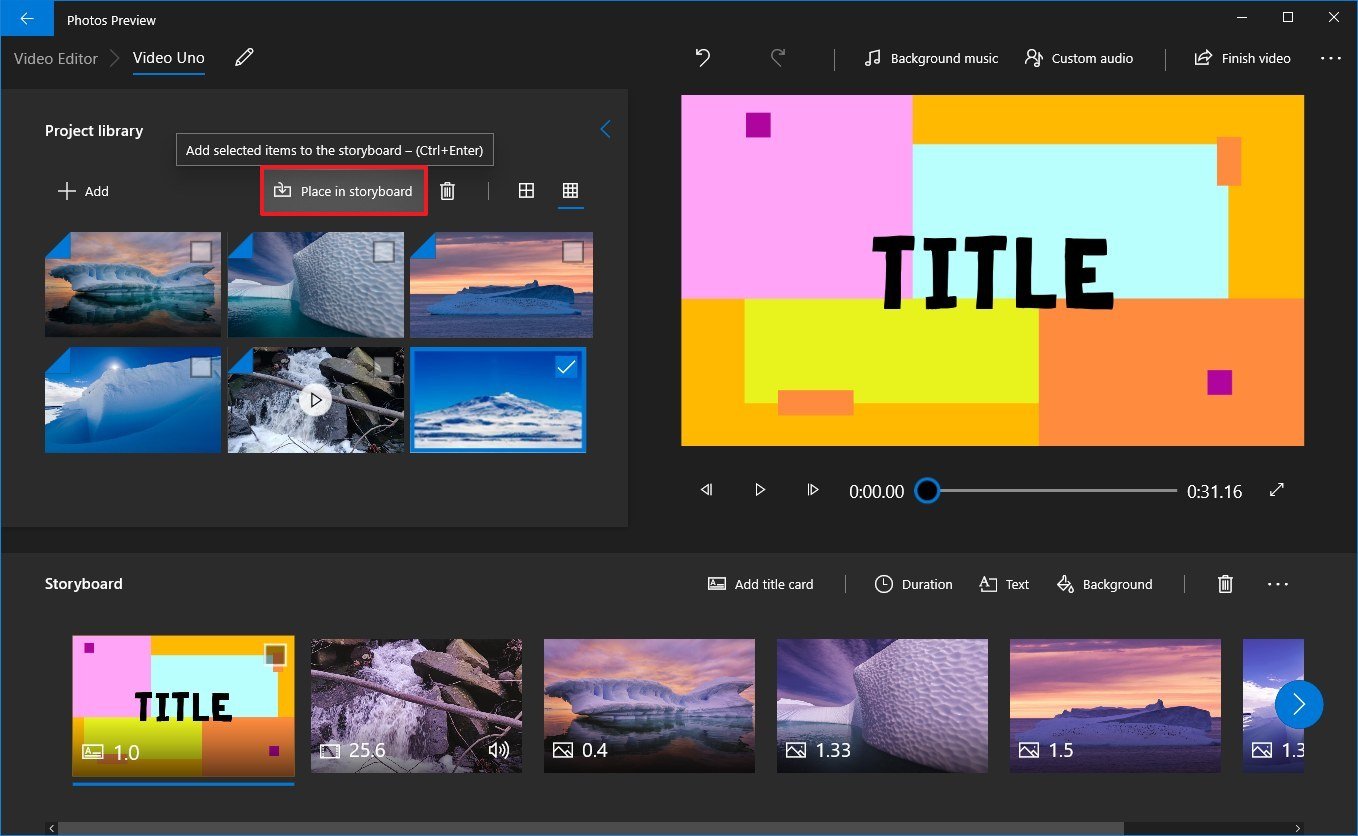 Source: Windows Cardinal


While editing a video, you can always add more media files, clicking the Add button, and yous can remove files by selecting the items and clicking the Trash button from the top-right.
Adding duration
As yous add media to the storyboard, you'll detect that every file includes a default time duration. If you want the media to have a shorter or longer period, utilise these steps:
- Under the "Storyboard" section, select the media element (or elements).
- Click the Duration button from the toolbar.
-
Select a time duration, or specify a time range in seconds.
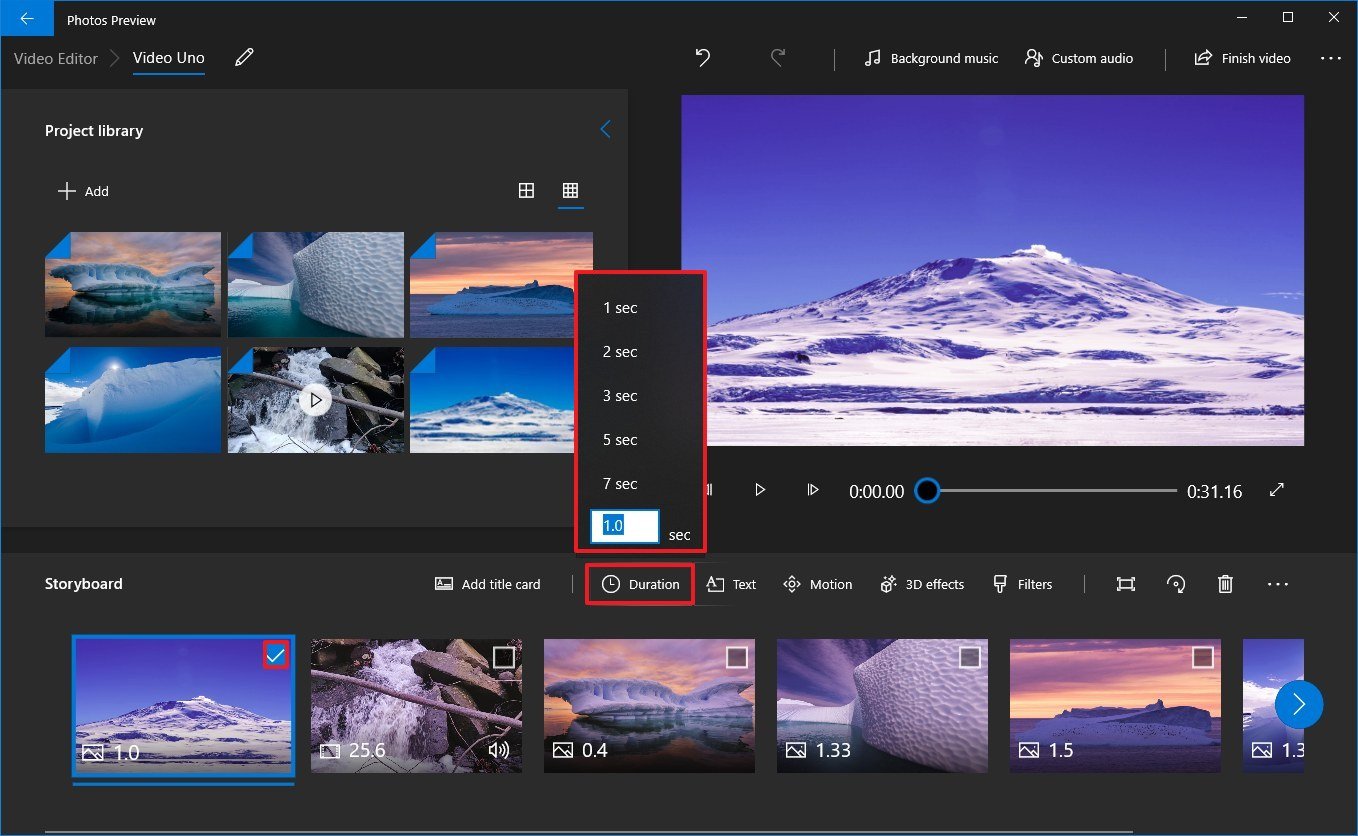 Source: Windows Central

After y'all complete the steps, the element will play in the video the time you lot specified. If you have multiple elements in the storyboard, you may demand to repeat the steps to change the duration for the remaining items.
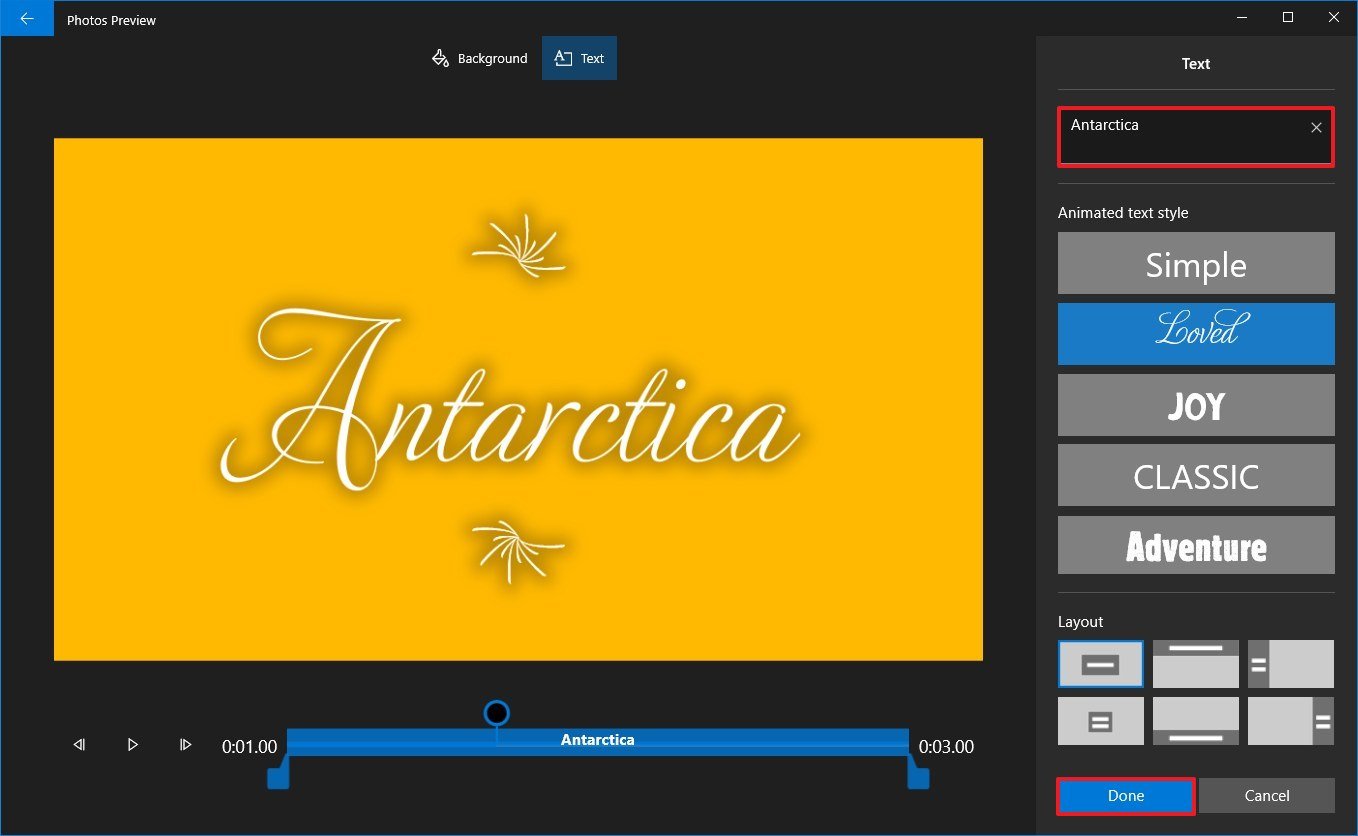
Adding text
You can also add together a custom title or caption to an image or video using these steps:
- Nether the "Storyboard" section, select the media element.
-
Click the Text button from the toolbar.
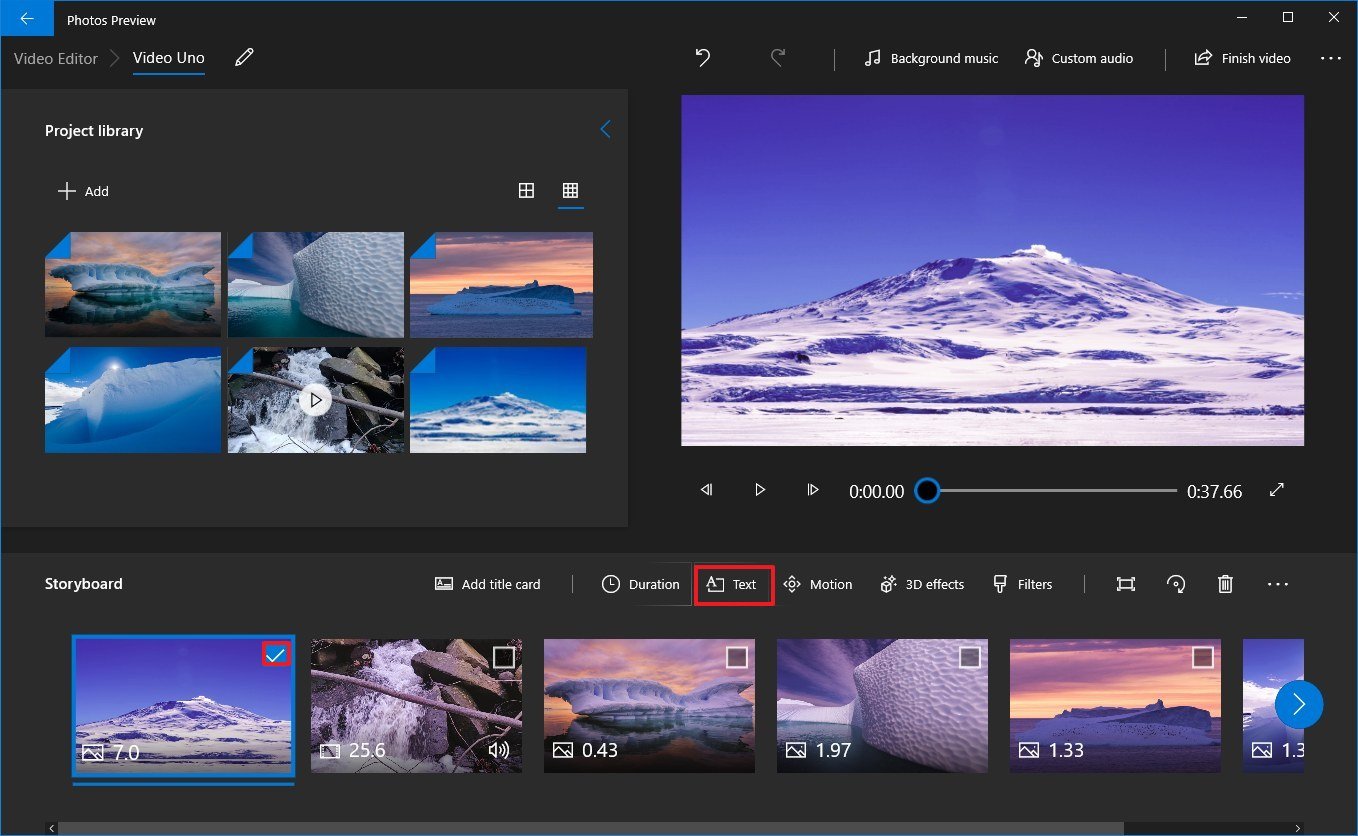 Source: Windows Primal
 -
Utilize the Text box to insert custom text.
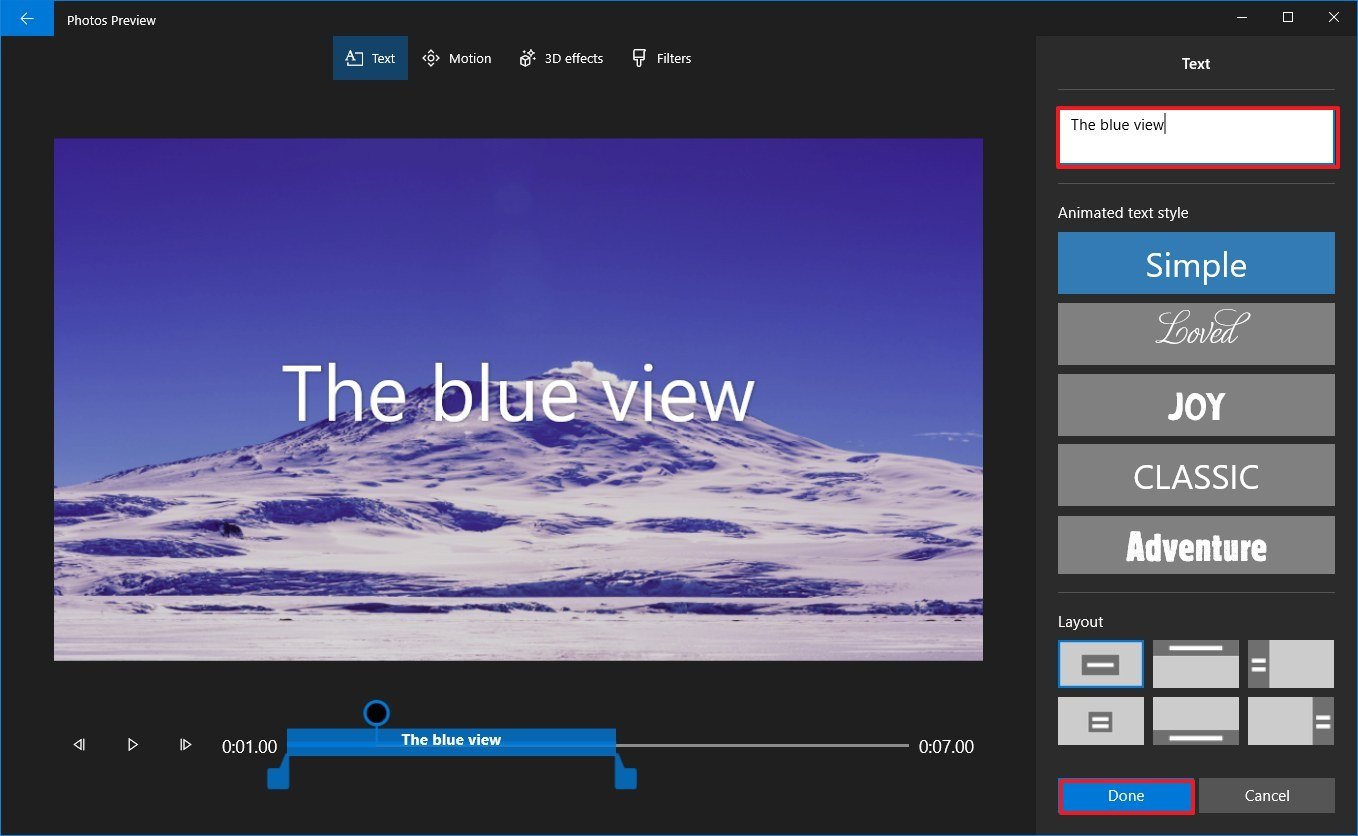 Source: Windows Central
 - Select the text style from the list.
- Select the location using the Layout options.
- Use the controls on the left side to specify the text duration and preview the changes.
- Click the Done push button.


Once y'all complete the steps, the text will apply to the element for the time you lot specified.
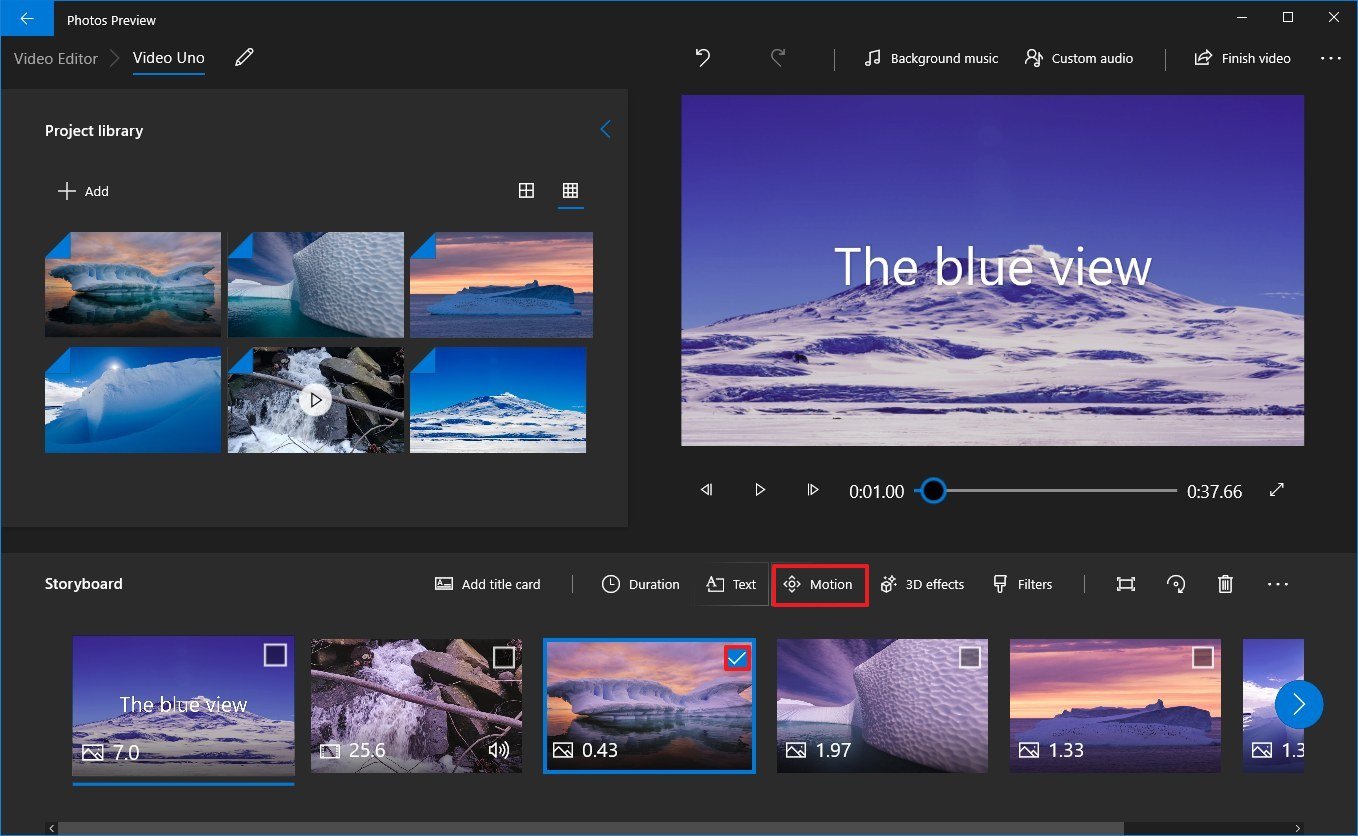
Adding motility
The video editor in Photos also lets y'all add photographic camera motion styles to images and videos with these steps:
- Under the "Storyboard" department, select the media element.
-
Click the Motility button from the toolbar.
 Source: Windows Central
 -
Select a motion effect for the prototype or video, such as Zoom in center, Zoom in right, Pan left, Tilt up and others.
 Source: Windows Key
 - Use the controls on the left side to preview the changes.
- Click the Done button.


Afterwards you complete the steps, you may need to repeat the steps to apply the same or different motion effect to other parts of the video.
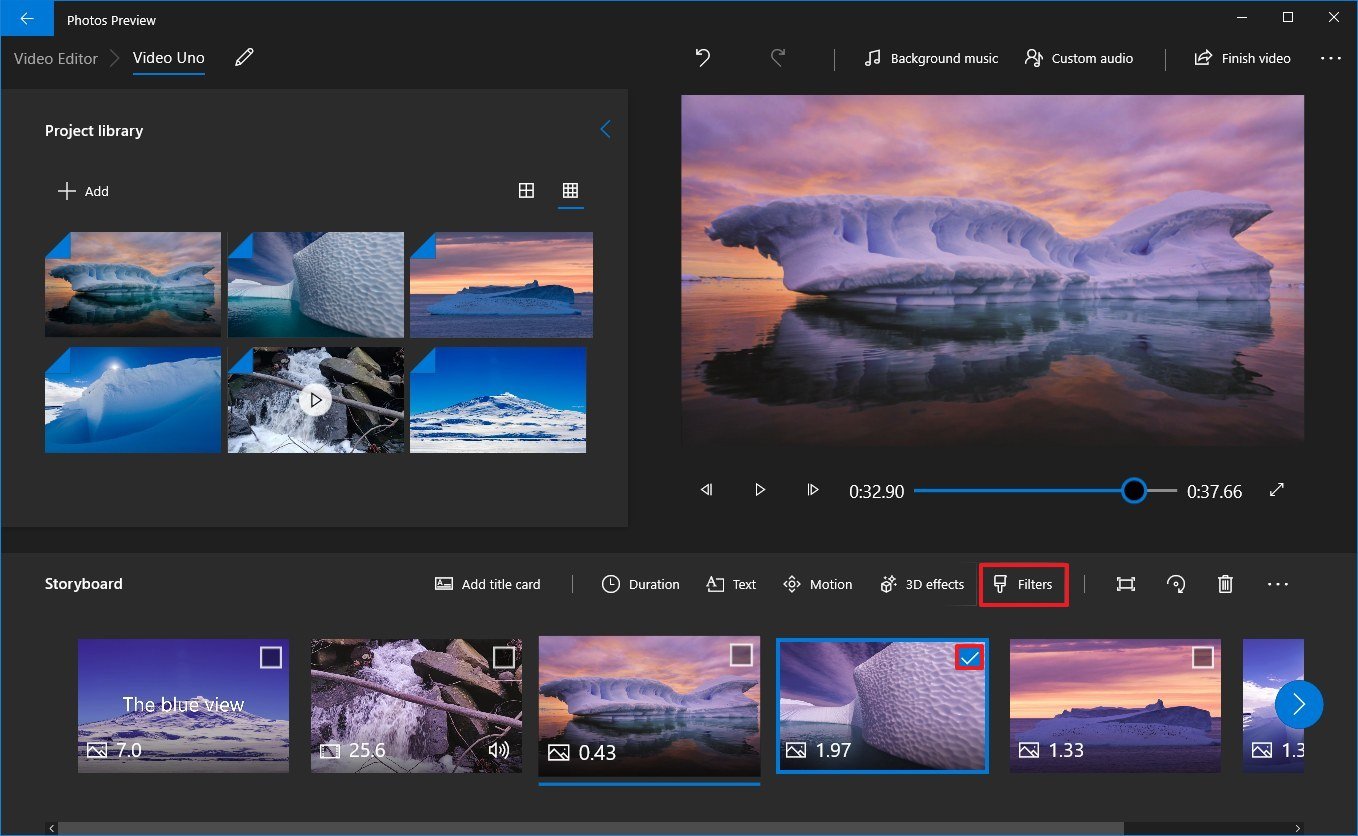
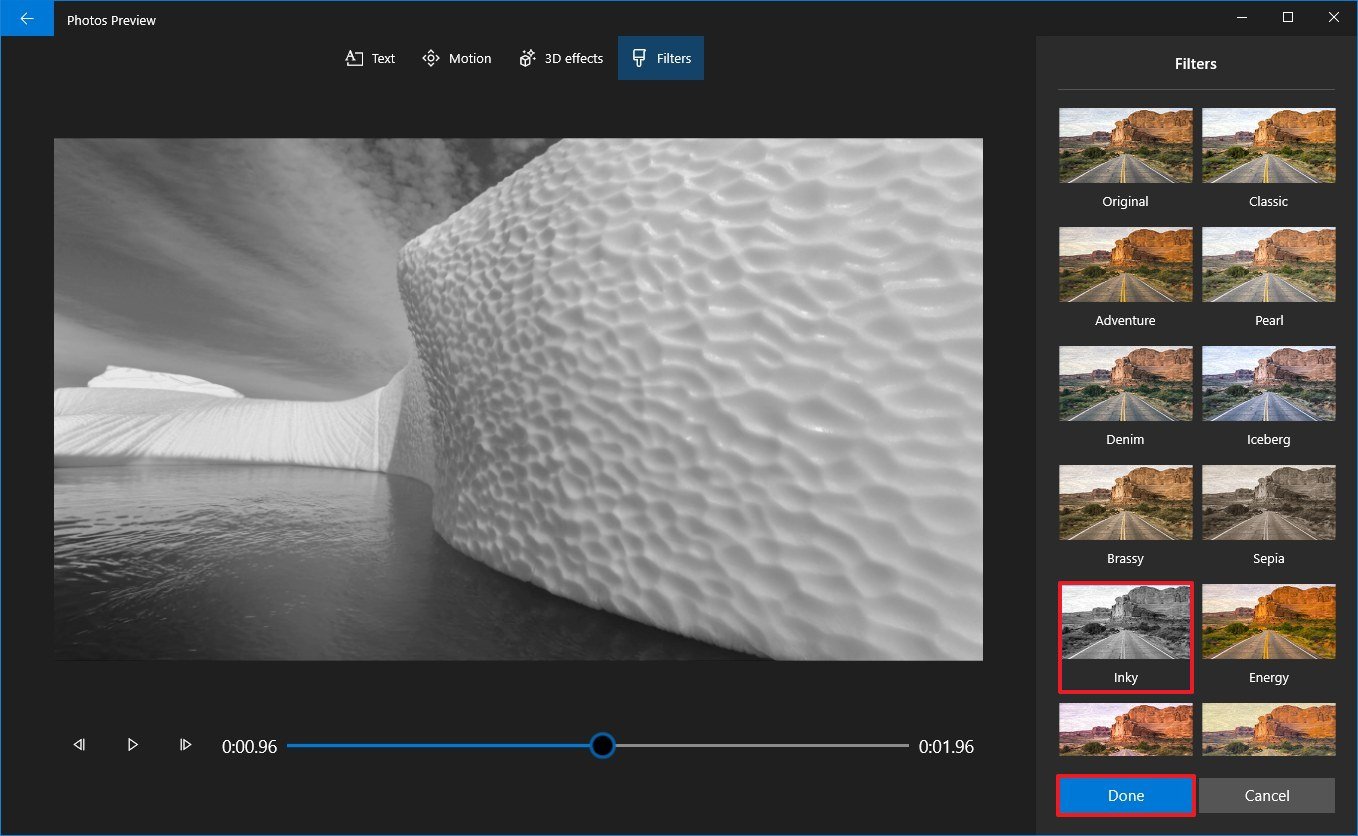
Adding filters
Using the video editor, you tin can even add together filters to change the await of the images or video clips in your project using these steps:
- Under the "Storyboard" section, select the media element.
-
Click the Filters push button from the toolbar.
 Source: Windows Central
 -
Select one of the fourteen filters bachelor, such every bit Classic, Adventure, Sepia, Inky, Loved, Pixel, etc.
 Source: Windows Central
 - Utilize the controls on the left side to preview the changes.
- Click the Done push button.


Later you complete the steps, the filter volition apply for the media file. If you take multiple parts of the project to use a specific filter, you'll need to repeat the steps for each chemical element.
Adding trim, split, speed
The Photos app editor also includes the power to trim, split, and control the speed of a video prune.
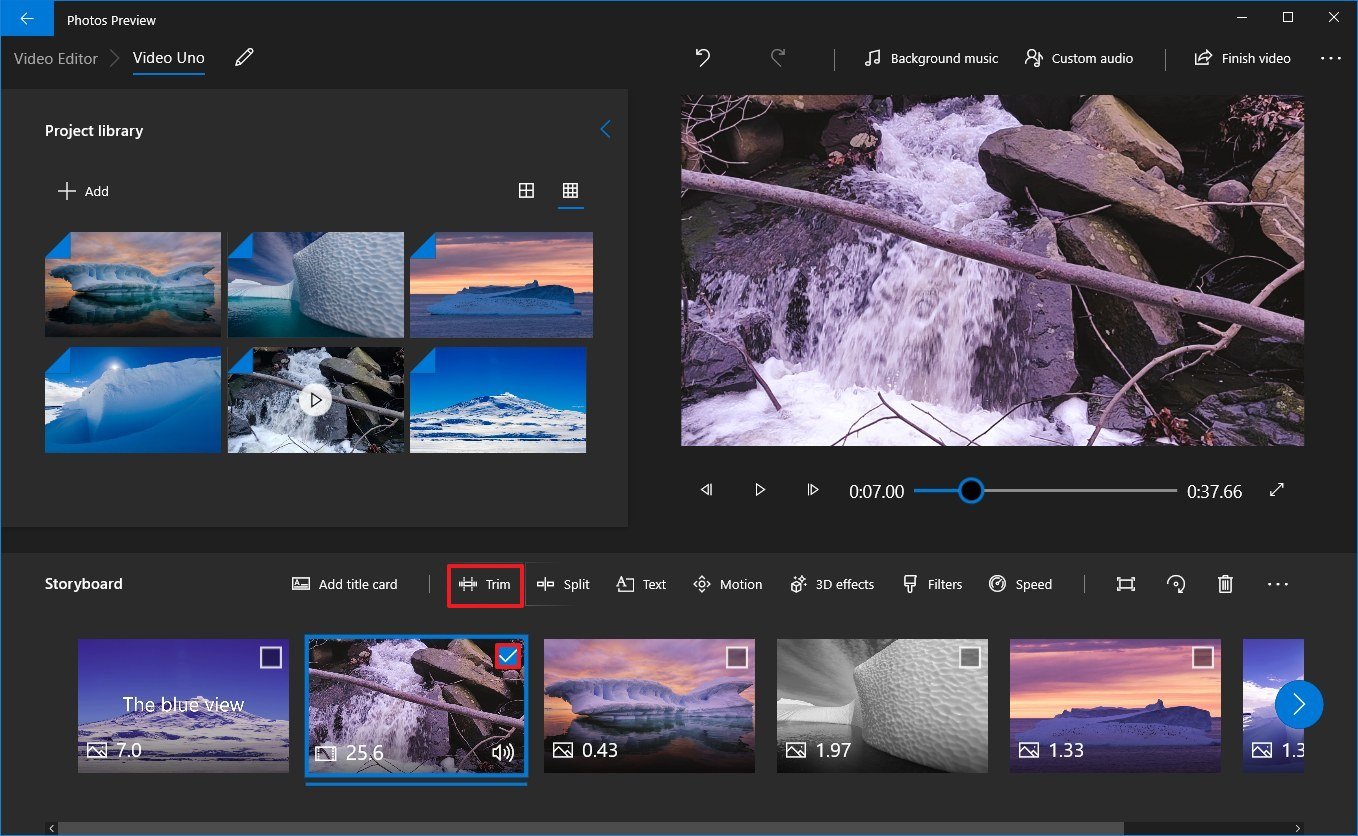
Trimming
To trim a video with the Photos app editor, use these steps:
- Under the "Storyboard" section, select the video clip.
-
Click the Trim button from the toolbar.
 Source: Windows Central
 -
Use the controls to choose the trim department.
Quick tip: When inserting a video prune to the storyboard, information technology'll not play the full length. If y'all want to include the entire video, you need to select the whole length using the trim option.
- Click the Done push.

Once you consummate the steps, only the video choice y'all specified will be included in the project.
Splitting
To divide a video prune into two or more parts with the Photos app, use these steps:
- Under the "Storyboard" section, select the video clip.
-
Click the Divide button from the toolbar.
 Source: Windows Central
 -
Apply the slider to choose the length of the prune.
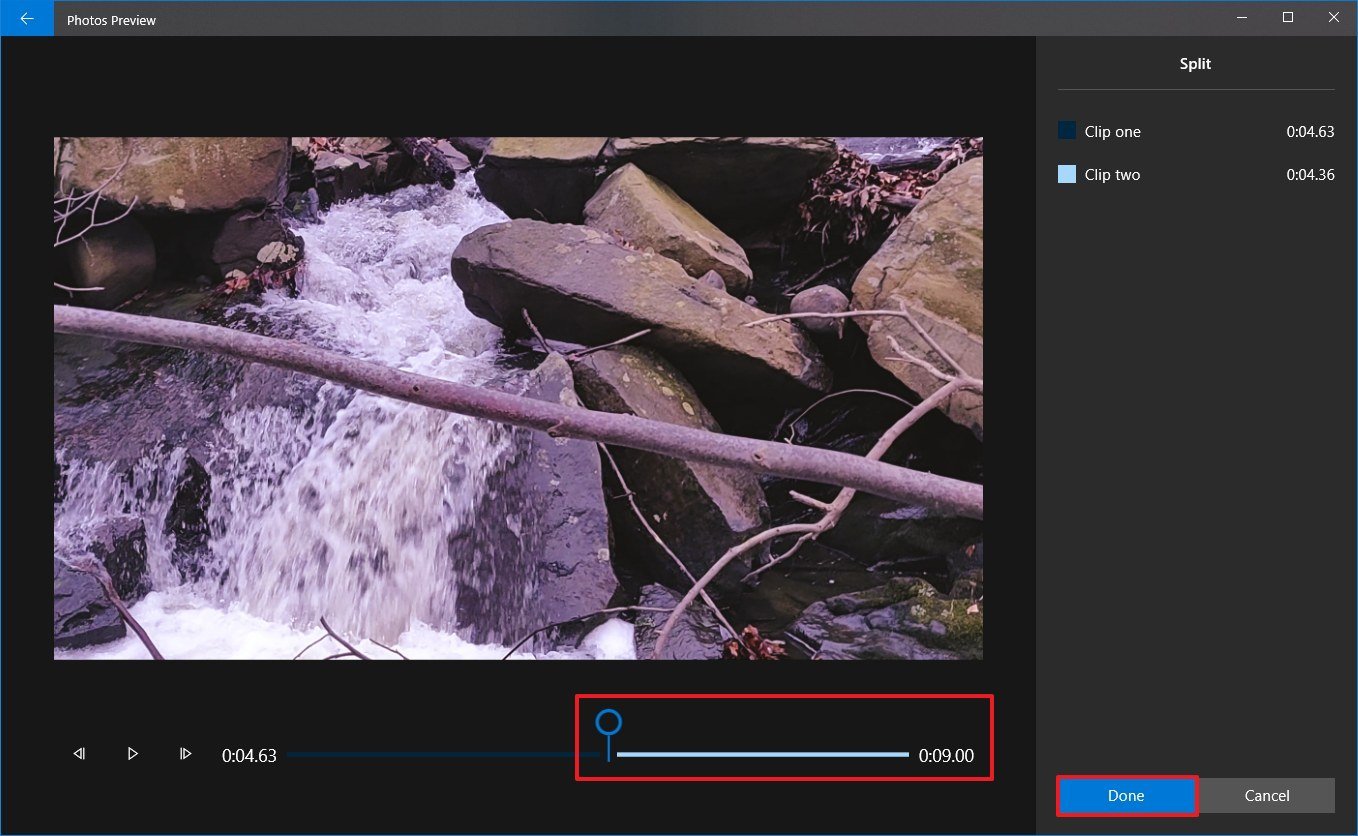 Source: Windows Fundamental
 -
Click the Done button.
Quick tip: If you want to separate the video in multiple clips, repeat steps No. 5 through 7.


Afterwards you complete the steps, you'll stop up with a video divided into multiple parts. (This pick volition not change the original video.)
Speeding
To boring down or speed upward a video clip in the storyboard, use these steps:
- Nether the "Storyboard" section, select the video prune.
-
Click the Speed push from the toolbar.
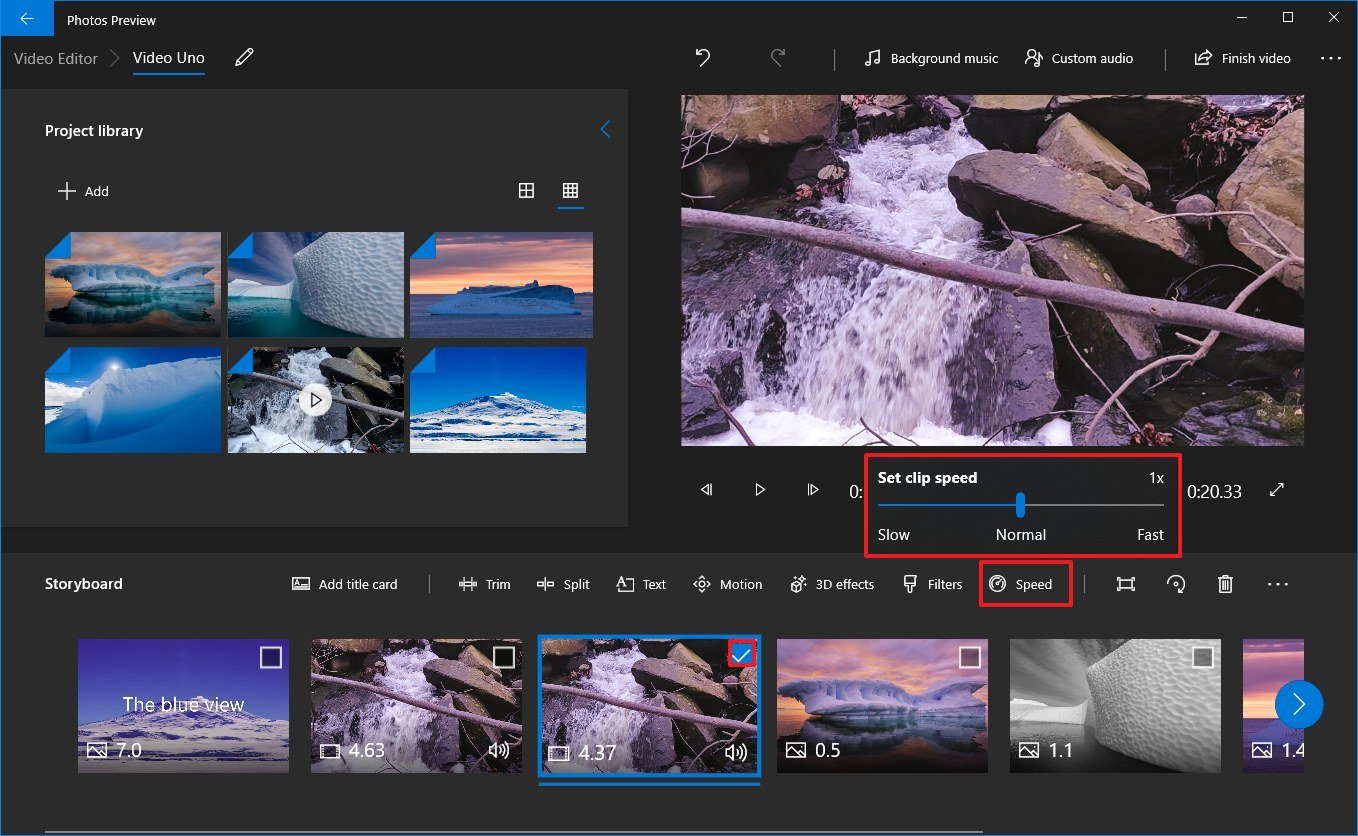 Source: Windows Central
 - Use the slider to choose the speed of the clip.

Once you complete the steps, the video will play using the speed y'all selected.
Adding title cards
While working on a video project, adding a title or custom text with a background is an excellent way to break the video into sections or marker a change in the scene.
To add together title cards to a video project in the Photos app, use these steps:
-
Under the "Storyboard" section, click the Add title card button.
 Source: Windows Central
 - Click, hold, and drag the card to the location you lot desire to show information technology.
-
Select the title card to focus and reveal the options.
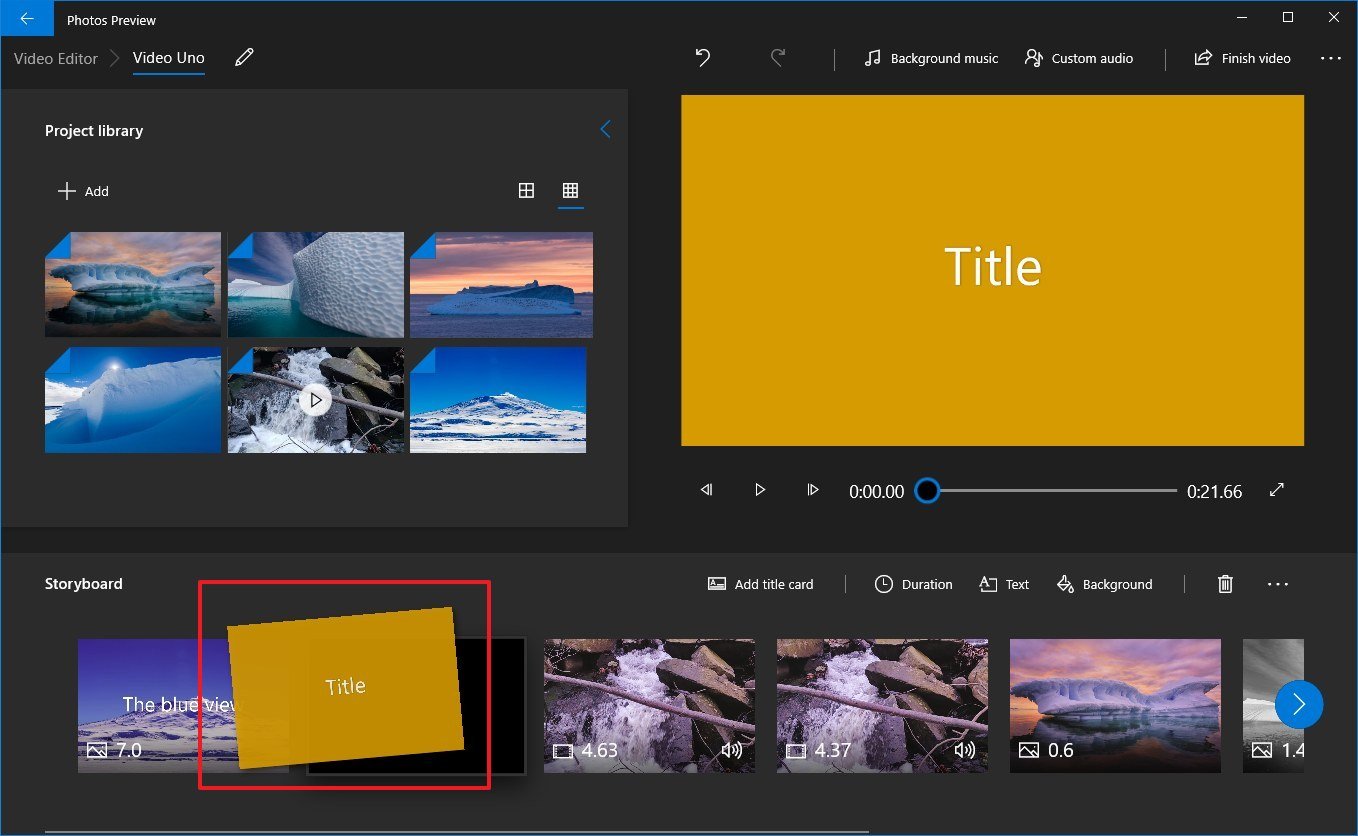 Source: Windows Central
 Quick tip: Y'all can always right-click the card to see the bachelor options.
-
Click the Text push button from the toolbar.
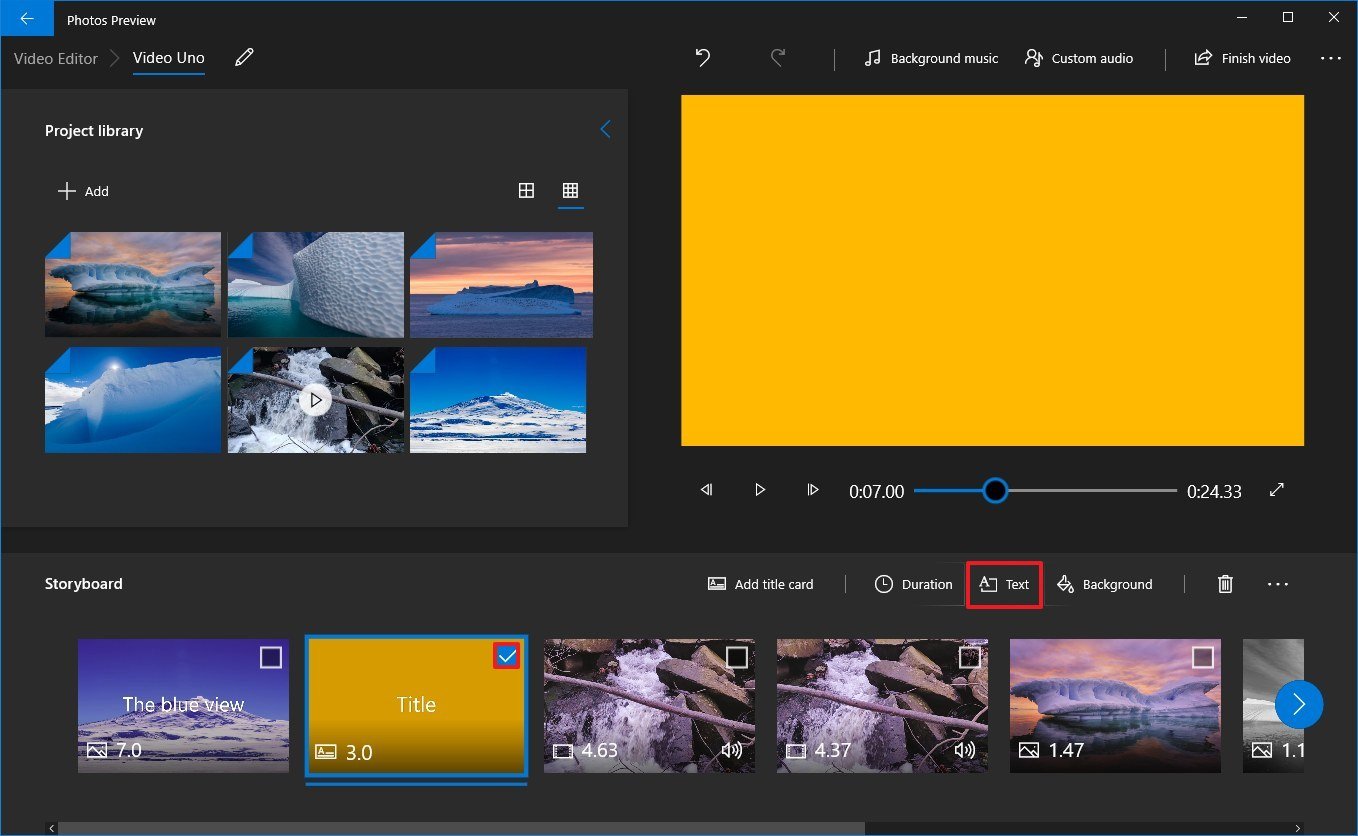 Source: Windows Central
 -
Use the Text box to insert custom text.
 Source: Windows Central
 - Select the text fashion from the list.
- Select the location using the Layout options.
- Use the controls on the left side to specify the text duration and preview the changes.
- Click the Done button.
- (Optional) Click the Background selection from the toolbar.
-
Select the background color.
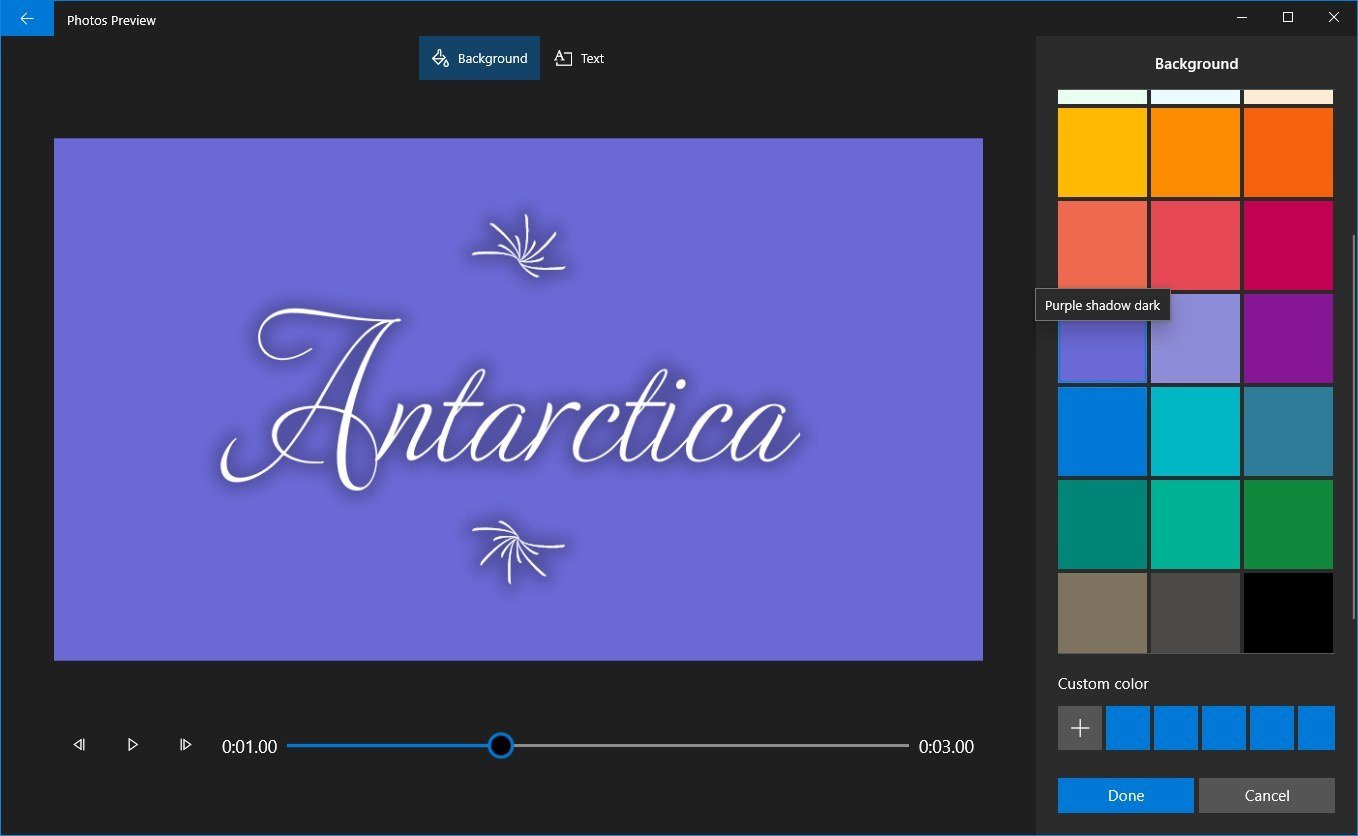 Source: Windows Central
 - Click the Done button.


If you want to add together a custom image as the background, and then add the image to the project, and so use the Text selection to add together the title or content you want.
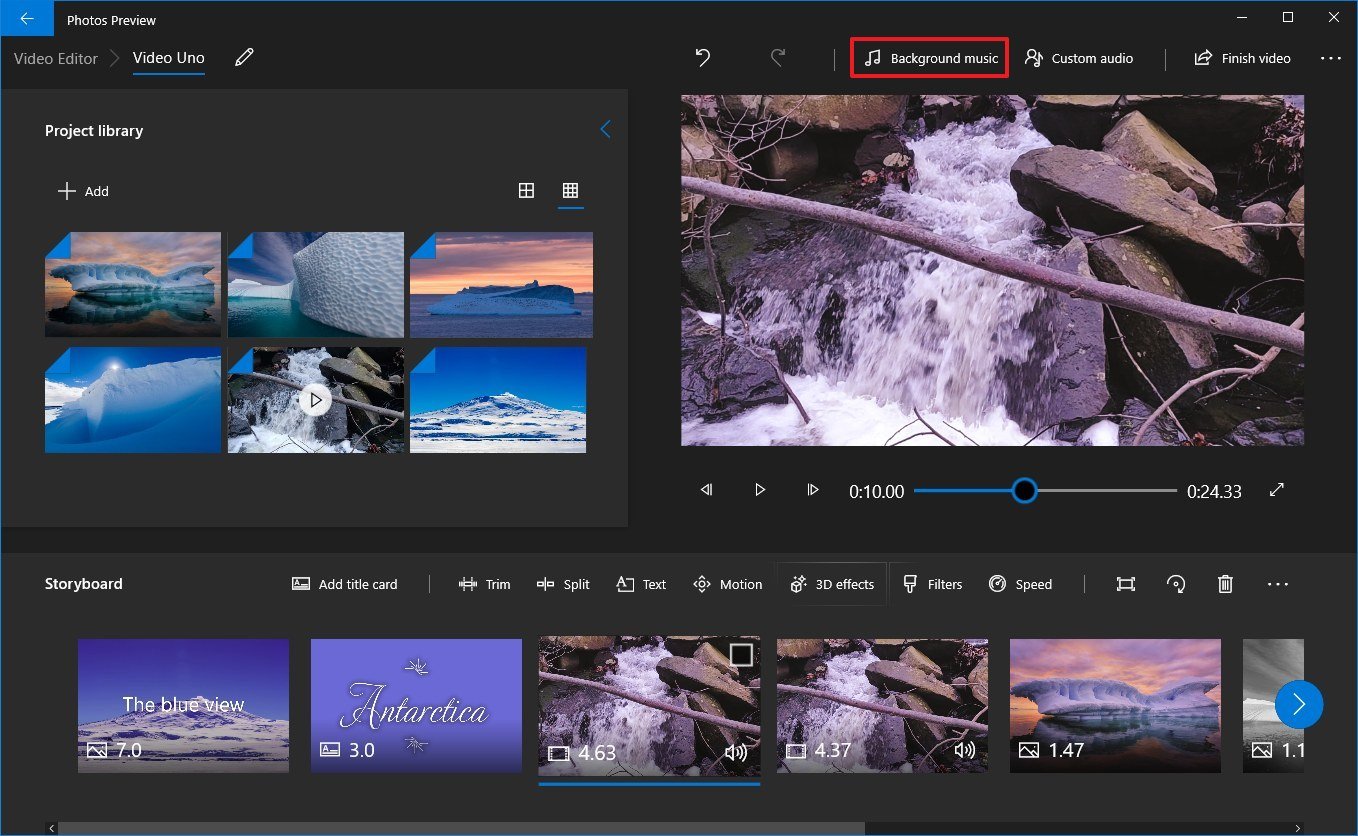
Calculation audio
The Photos app editor includes the ability to insert background music and custom audio (such equally narration) to add some life to your video.
Background music
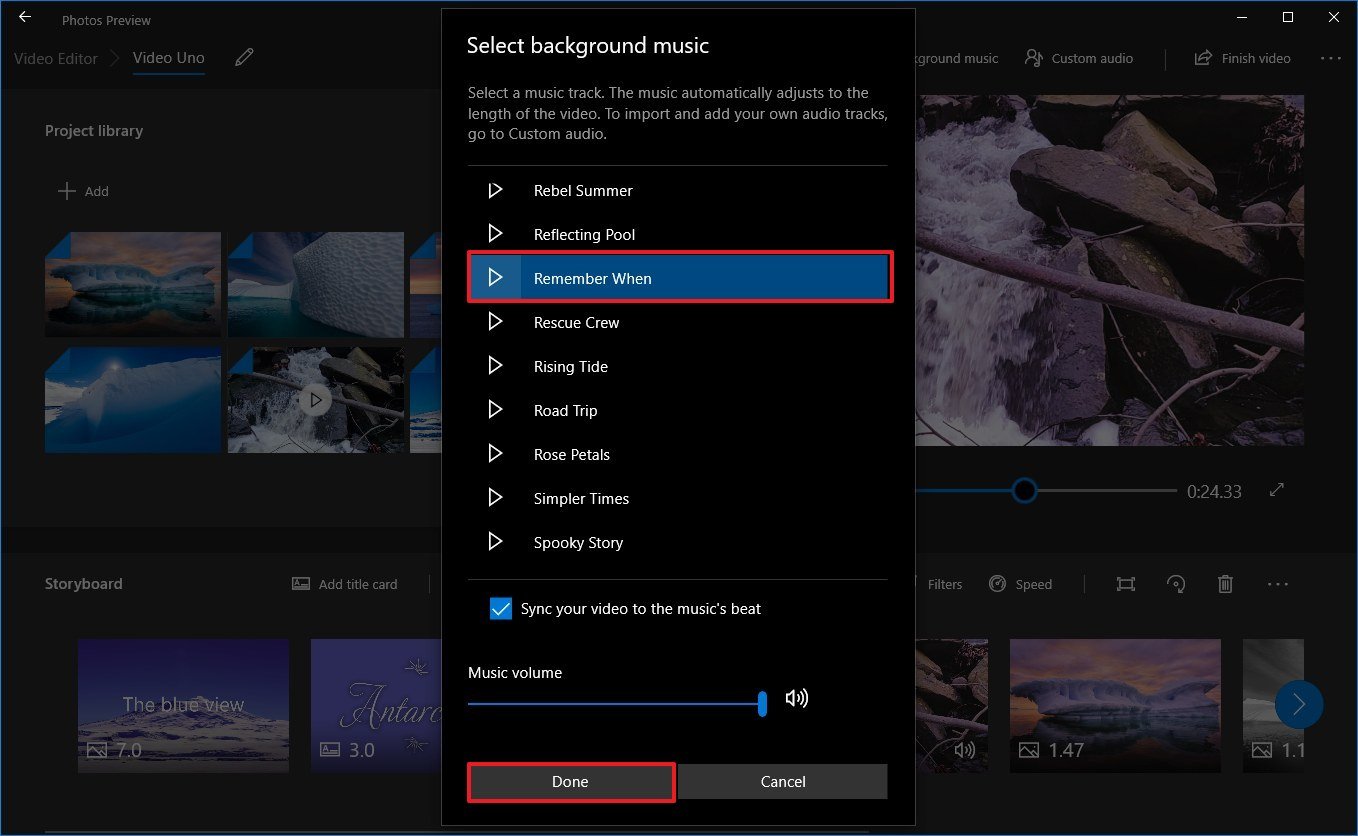
To add groundwork music to your project, use these steps:
-
Click the Background music button from the meridian-right corner.
 Source: Windows Key
 -
Select the soundtrack y'all want to use. (You can click the triangle Play push to preview the music.)
 Source: Windows Central
 - Check the Sync your video to the music's beat selection.
- Set the music volume using the slider option.
- Click the Done push.


Later you consummate the steps, the soundtrack will adapt automatically to the full length of your video.
Custom sound
To add custom audio or narration to your video project, utilize these steps:
-
Click the Custom audio button from the top-right corner.
 Source: Windows Central
 -
Click the Add audio file button.
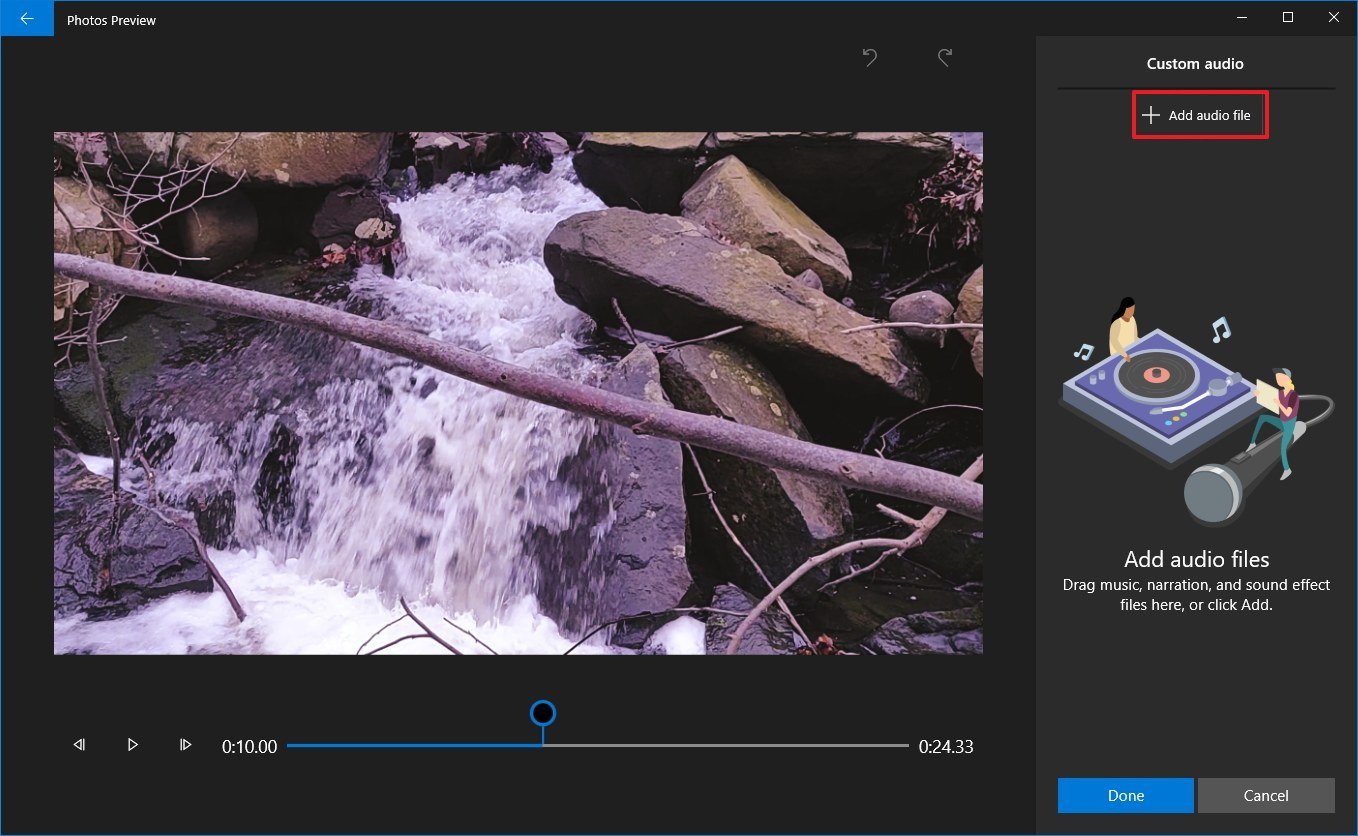 Source: Windows Key
 - Select the sound rails.
-
Click the Open button.
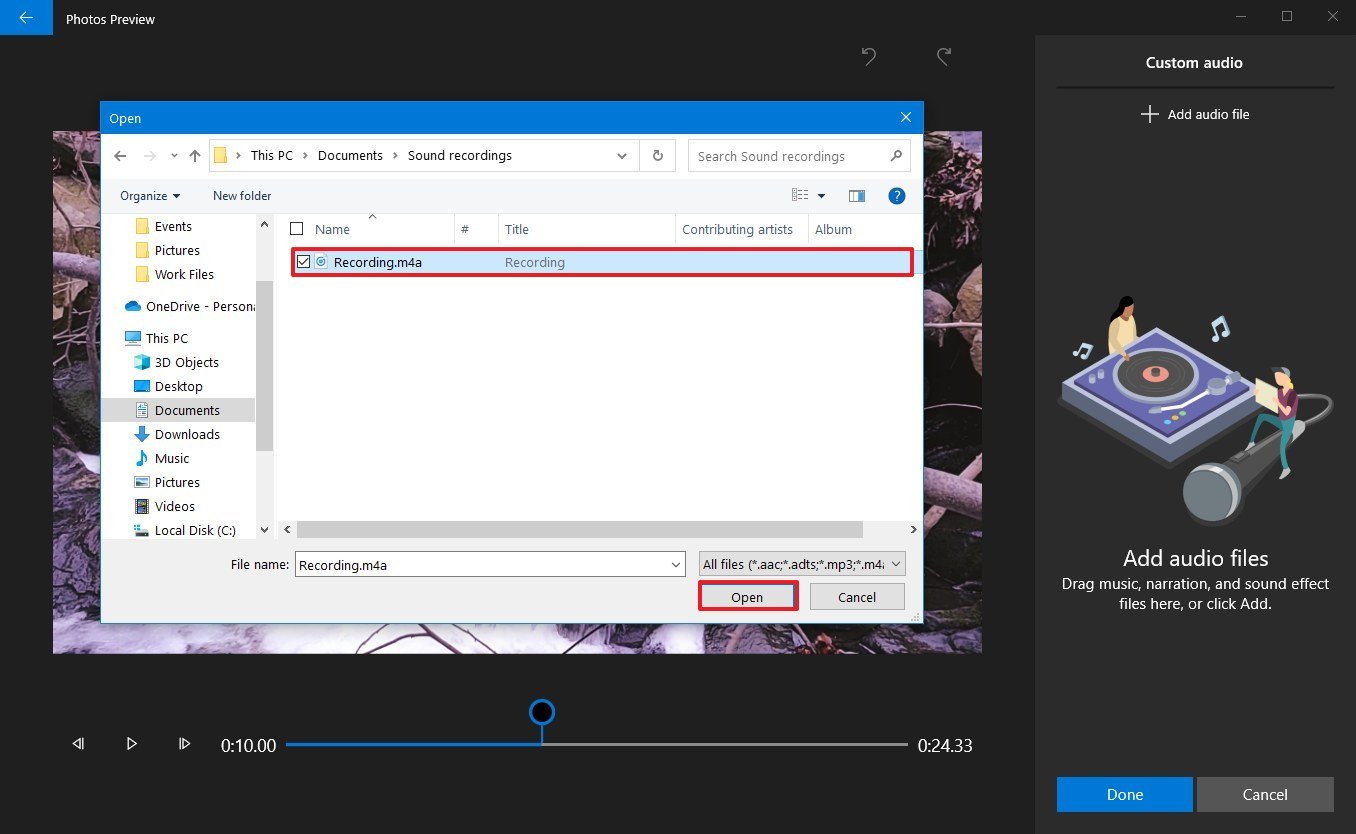 Source: Windows Key
 -
Apply the controls on the left side to specify where the audio should play.
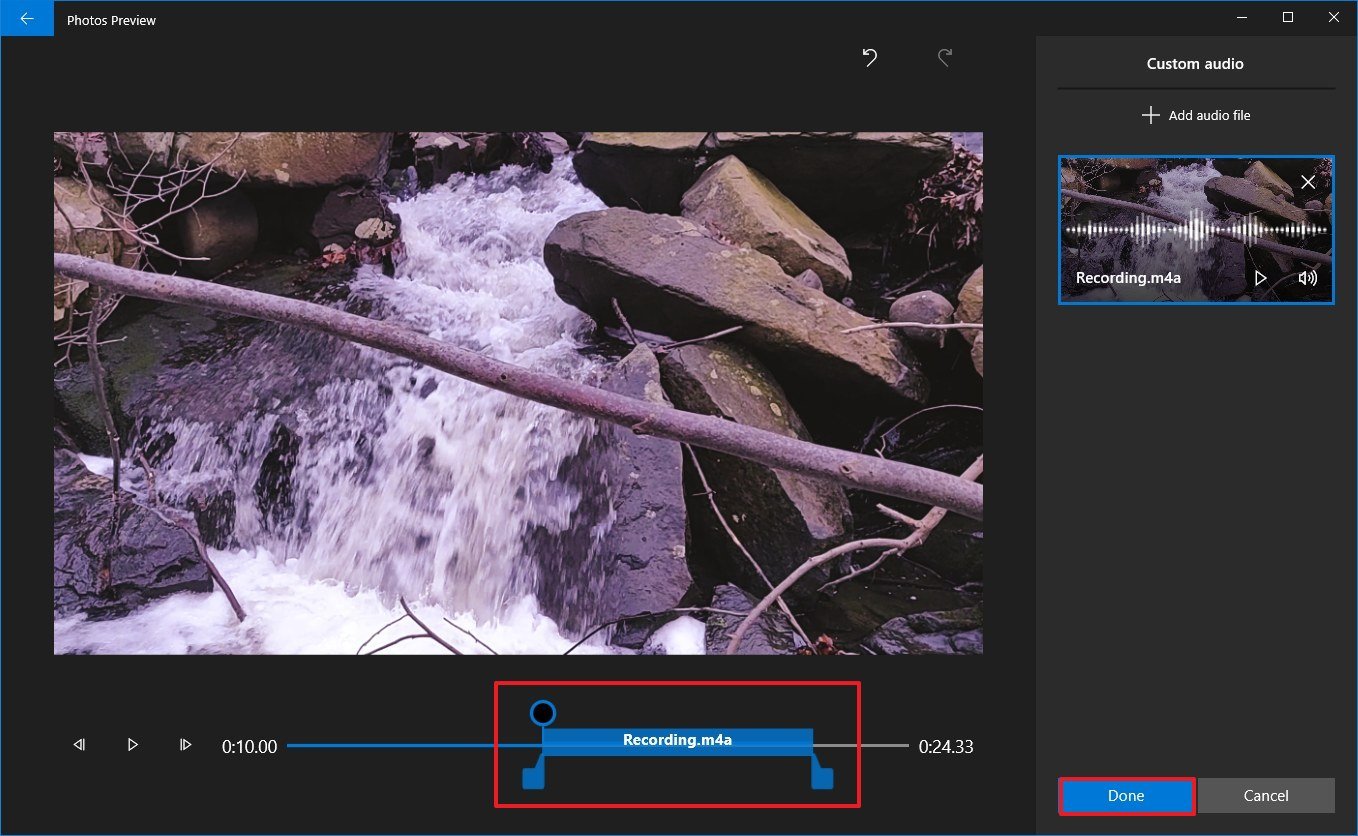 Source: Windows Key
 - Click the Done button.


Once you complete the steps, the narration or custom music track volition utilise to your project.
If you need to add narration, you can use the Voice recorder app to create a recording that you tin can then import to the project.
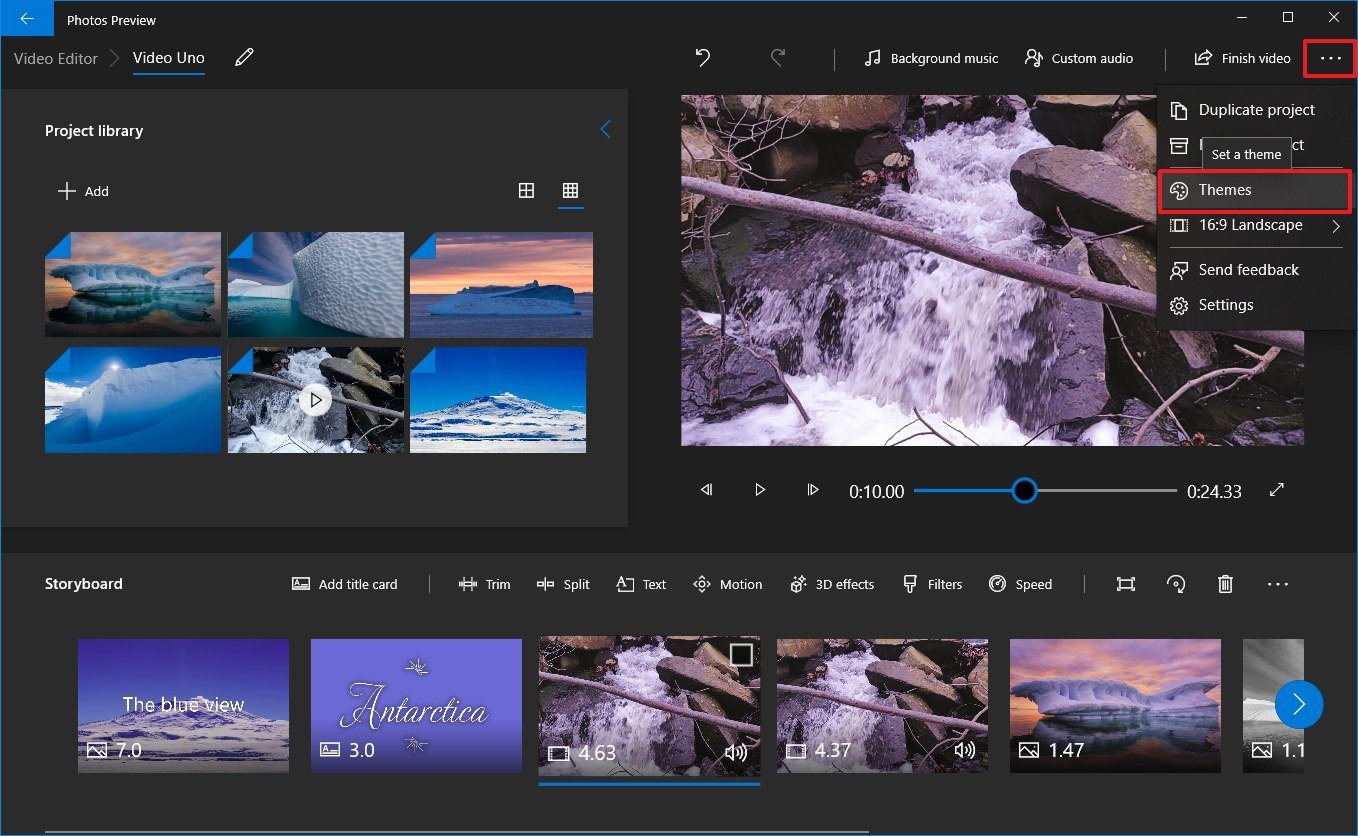
Calculation theme
Simply like using the automatic video characteristic, y'all can also add a theme to restyle the video with filters, music, and text styles.
To apply a theme to a video projection, use these steps:
- Click the menu (3-dotted) push button from the tiptop-right corner.
-
Select the Themes option.
 Source: Windows Primal
 -
Select a theme for the list.
 Source: Windows Fundamental
 - Click the Play button to preview the changes.
- Click the Washed push.


After you complete the steps, the new theme will utilise to the entire video, and you tin preview information technology clicking the Play push button in the preview department.
How to add 3D effects video project using Photos
Perchance i of the most exciting features in the Photos app is 3D special effects that you tin can add together to the media chemical element.
To add 3D furnishings to a video projection, use these steps:
- Open Photos.
- Click the Video Editor tab.
-
Select the project you desire to add 3D effects.
 Source: Windows Central
 - Under the "Storyboard" department, select the media element.
-
Click the 3D furnishings push button from the toolbar.
 Source: Windows Primal
 -
Click the Effects tab.
 Source: Windows Primal
 -
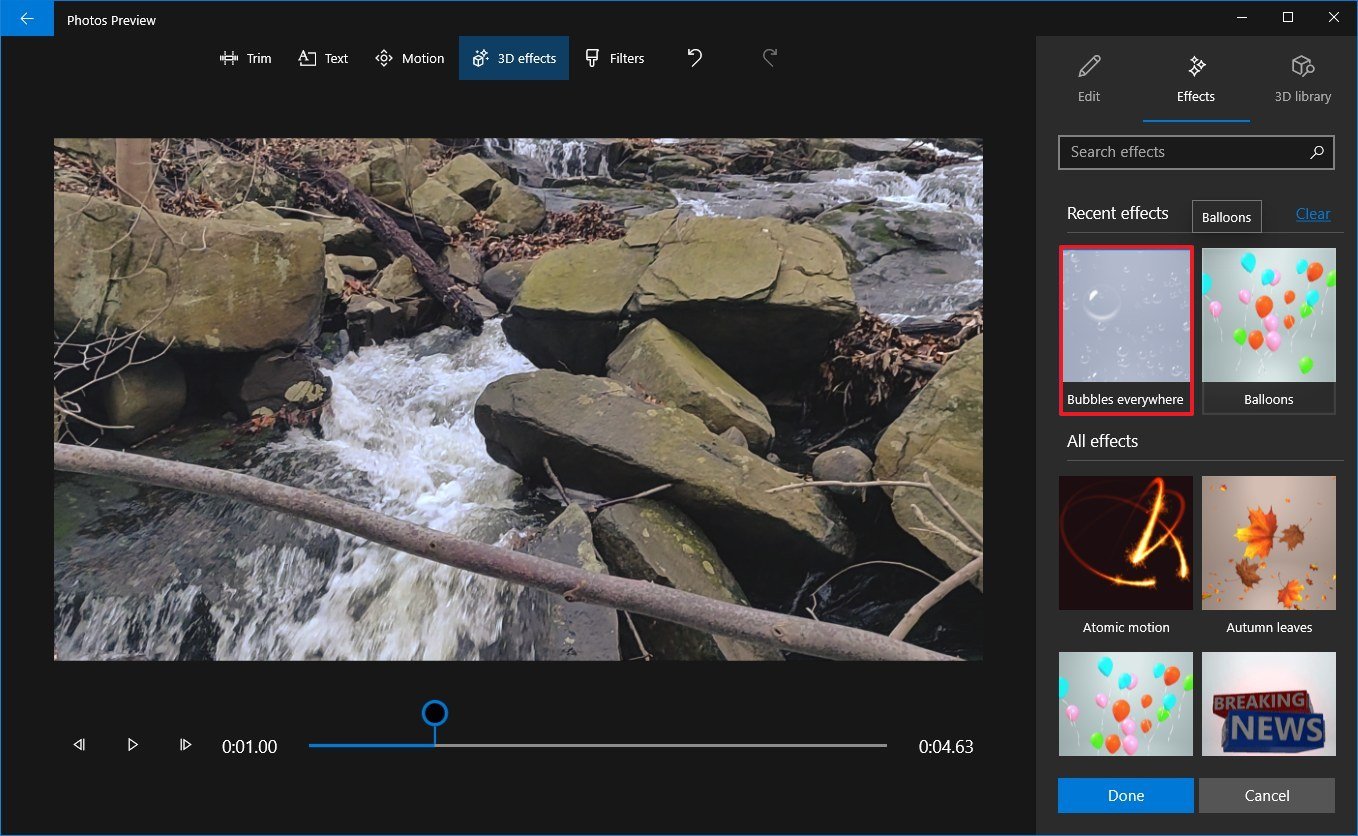
Select the 3D effect into the preview on the left.
 Source: Windows Primal
 - Utilise the controls on the left side to adapt the duration of the effect.
- Click the 3D library tab.
-
Select the library category.
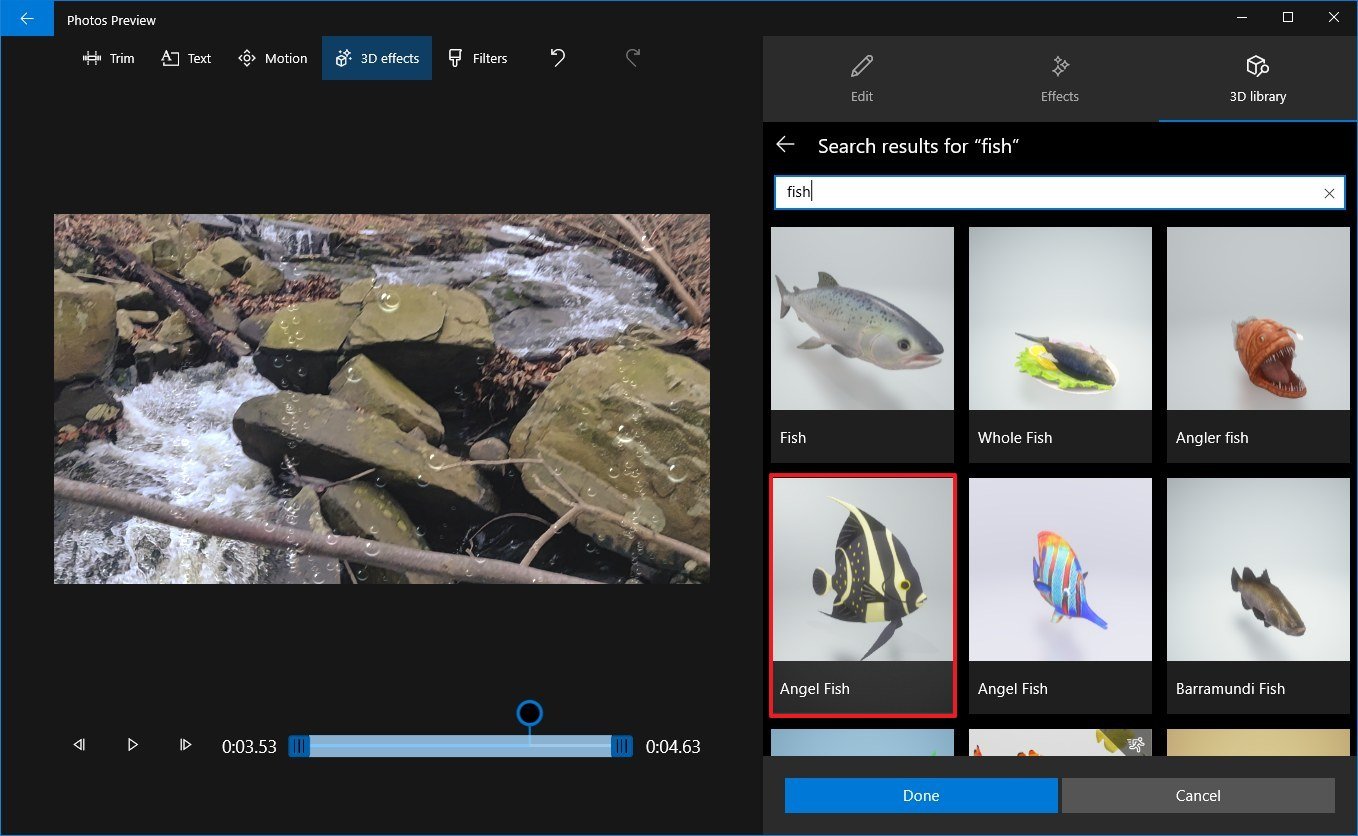 Source: Windows Central
 - Select the element to add to the video.
-
Use the controls on the left side to drag and position the element in the clip. (You can as well rotate and scale the effect using the controls.)
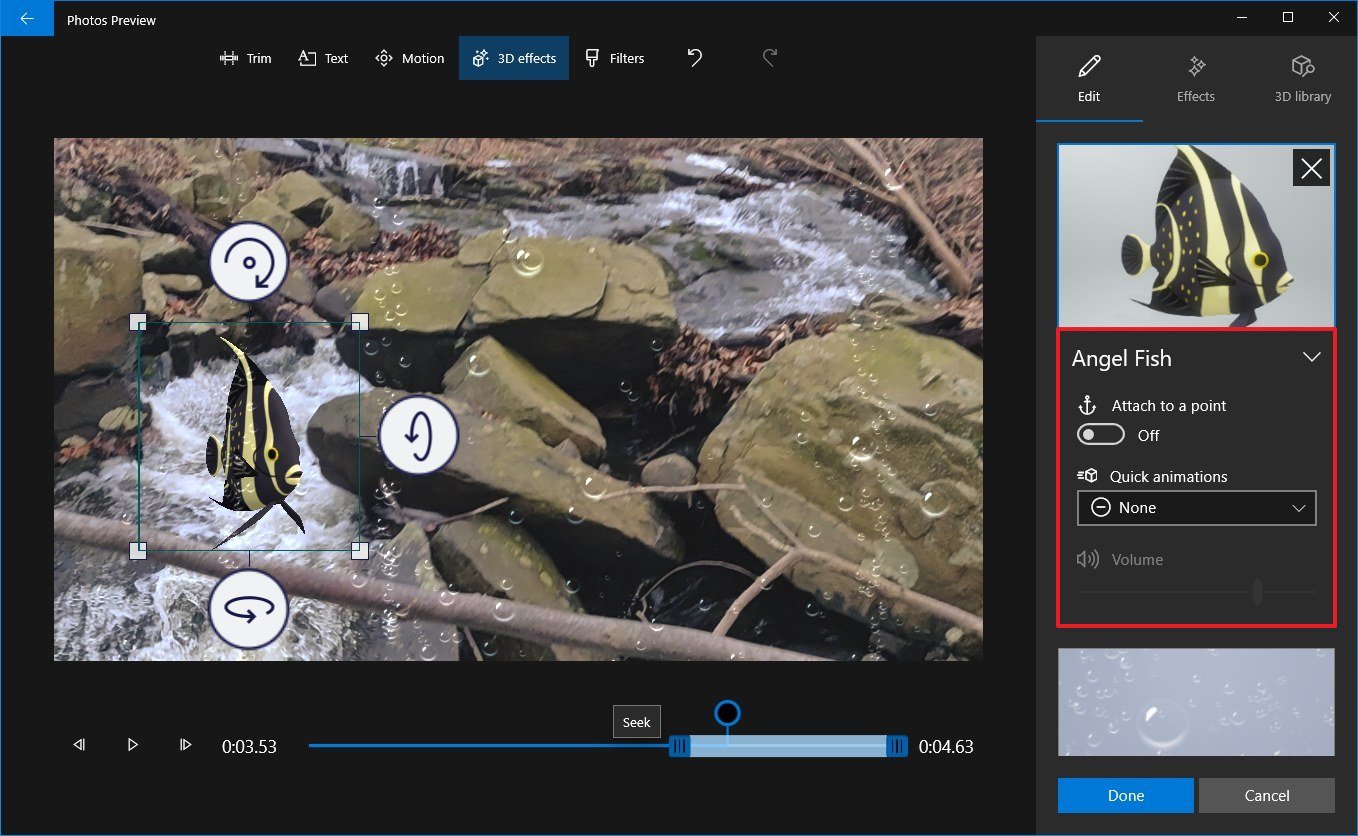 Source: Windows Central
 - Apply the controls to attach the chemical element to an object in the video clip. And so, fifty-fifty if the camera was moving during the recording, the 3D outcome volition stay in the correct identify.
- (Optional) Use the Quick animations driblet-down menu to select an animation (if applicable).
- Click the Done push.


Once yous complete the steps, you'll end up with a more than engaging clip using 3D effects.
How to backup video project using Photos
The Photos app video editor too allows you lot to fill-in a project so y'all can use it on another computer.
To backup a video project in the Photos app, use these steps:
- Open Photos.
- Click the Video Editor tab.
- Select the project you lot desire to fill-in.
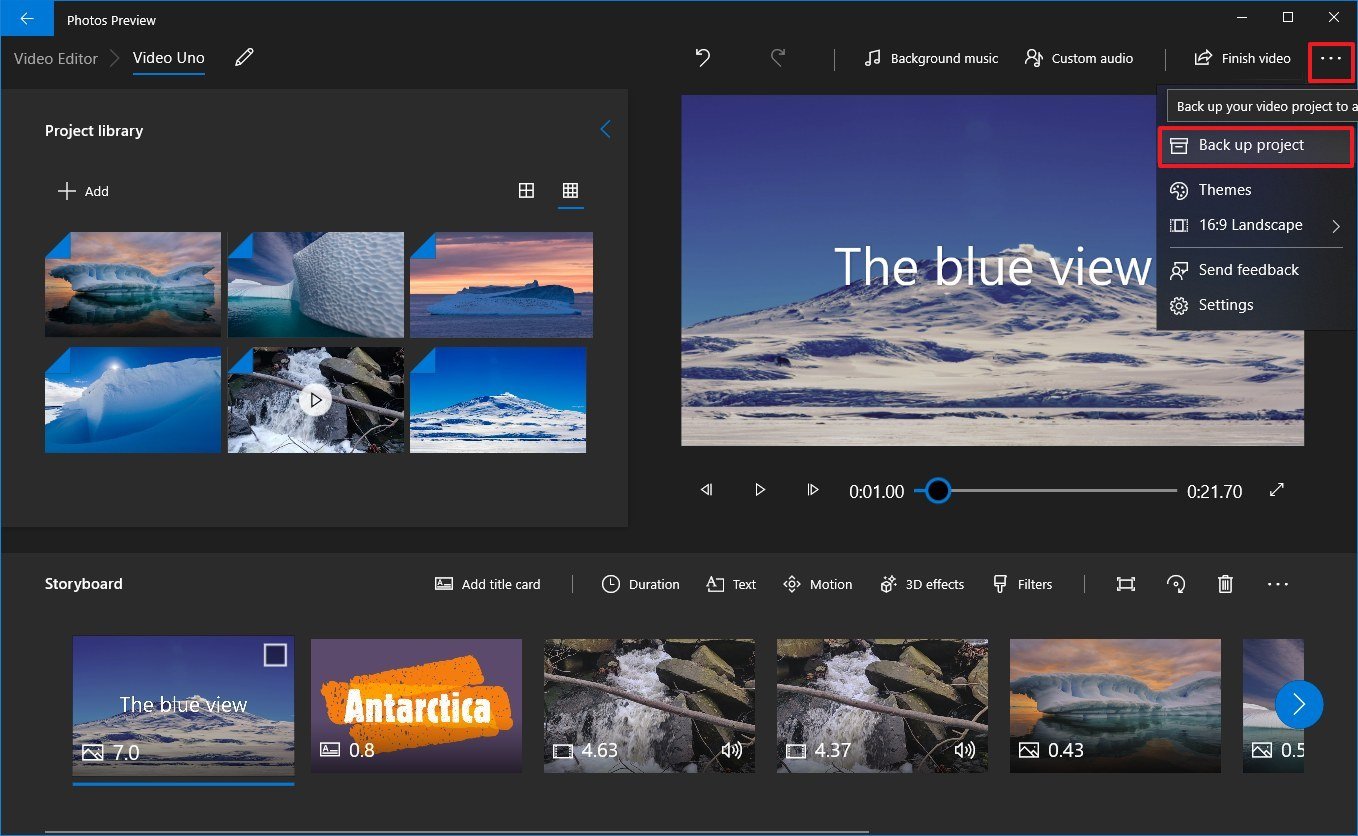
- Click the carte (three-dotted) button from the height-right corner.
-
Select the Support project option.
 Source: Windows Central
 Quick tip: Yous can also use the Duplicate project selection to fork some other video with similar elements to salvage time.
- Click the Choose backup location button.
- Select the folder location.
-
Click the Salvage push.
 Source: Windows Central
 - Click the OK button.


Afterwards you consummate the steps, you'll end upwardly with a ".vpd" file that contains the project edits and media files that you tin can go along working in the video on another device.
More than Windows ten resources
For more helpful articles, coverage, and answers to mutual questions about Windows x, visit the post-obit resources:
- Windows ten on Windows Cardinal – All y'all demand to know
- Windows x aid, tips, and tricks
- Windows ten forums on Windows Central

It could piece of work
Hither's why 'saving' Surface Neo by putting Android on information technology makes sense
Surface Neo was never officially canceled, but it'southward likewise unofficially never coming. What should Microsoft exercise with the design? It'southward too small for Windows 11, and there's no Windows 10X. Would Android be a expert fit? It seems to be working for Surface Duo, which is nothing more than a smaller version.

How To Use Windows 10 Photo App,
Source: https://www.windowscentral.com/how-start-using-photos-video-editor-windows-10
Posted by: mcgonaglethemisside.blogspot.com
0 Response to "How To Use Windows 10 Photo App"
Post a Comment